Exposing a MCP Server
Model Context Protocol (MCP) is an open standard for enabling language models to use tools, retrieve data, and operate over structured inputs. If you’re running a local MCP server, Inspectr lets you expose it securely to the internet and inspect real-time traffic.
Inspectr makes it easy to run and test your local MCP servers by exposing them via a streamable HTTP transport. This allows you to connect MCP servers to a wide range of MCP clients without worrying about WebSocket bindings or specialized transports.
If you haven’t built an MCP server yet, start with the Build a Local MCP Server guide ↗ before continuing here.
What You’ll Learn
Section titled “What You’ll Learn”In this guide, you’ll learn how to:
- Run a local MCP server.
- Expose your MCP server as an HTTP/SSE endpoint.
- Test your MCP server visually with the MCP Inspector.
- Connect your server to popular MCP clients like Claude Desktop, Cursor, and Windsurf.
- Securely share your MCP server session with teammates.
Prerequisites
Section titled “Prerequisites”Before you begin, make sure you have:
- Node.js 22+ installed on your system.
- npm or npx available to run Inspectr and MCP tools.
- A working MCP server (for example, the Everything MCP server).
Step 1: Start Your MCP Server
Section titled “Step 1: Start Your MCP Server”Let’s say you already have an MCP server, spin it up.
mcp-server --port 3001or if you are looking for an example MCP server, you can use the Everything MCP server or follow the “Exposing a FastMCP server” guide
npm run start:streamableHttp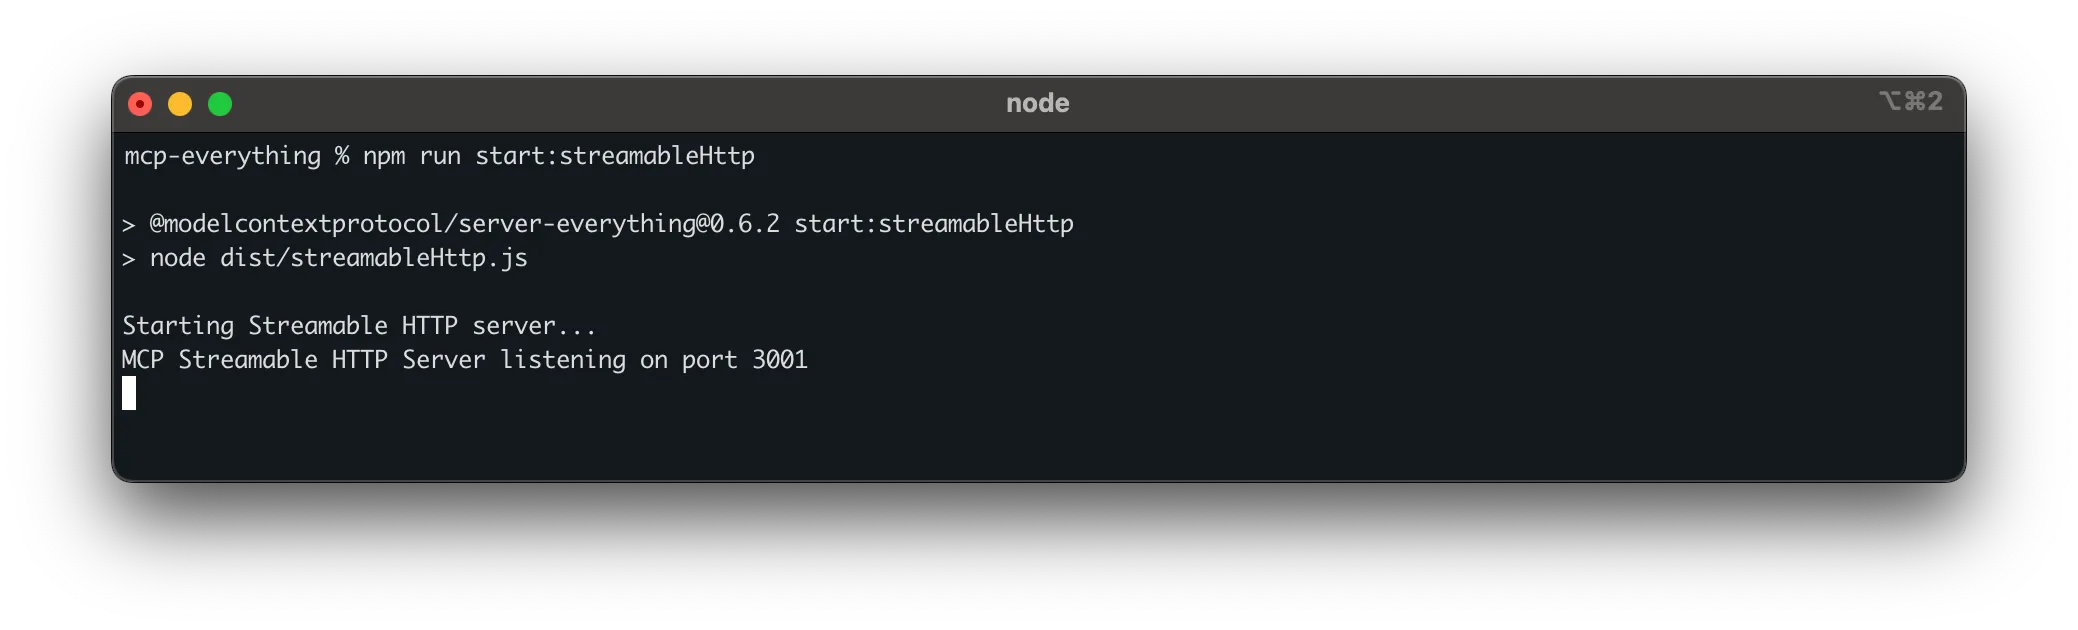
This means that the MCP server is running on http://localhost:3001
Step 2: Start Inspectr to Expose Your MCP Server
Section titled “Step 2: Start Inspectr to Expose Your MCP Server”inspectr \ --backend=http://localhost:3001 \ --expose \ --channel=mcp-demo \ --channel-code=mcpserver123
This means:
- Inspectr listens on port
8080(use--listen=to change this) - Forwards traffic to your MCP server on port
3001 - Captures and displays traffic in the App UI at http://localhost:4004
The MCP server is now publicly available at:
https://mcp-demo.in-spectr.devStep 3: Test with the MCP Inspector
Section titled “Step 3: Test with the MCP Inspector”The @modelcontextprotocol/inspector is a visual testing tool for MCP servers.
You can start the MCP Inspector with the following command:
npx @modelcontextprotocol/inspectorAs the server URL, enter the Inspectr session URL from above (notice the /mcp if that is applicable), for example:
https://mcp-demo.in-spectr.dev/mcp
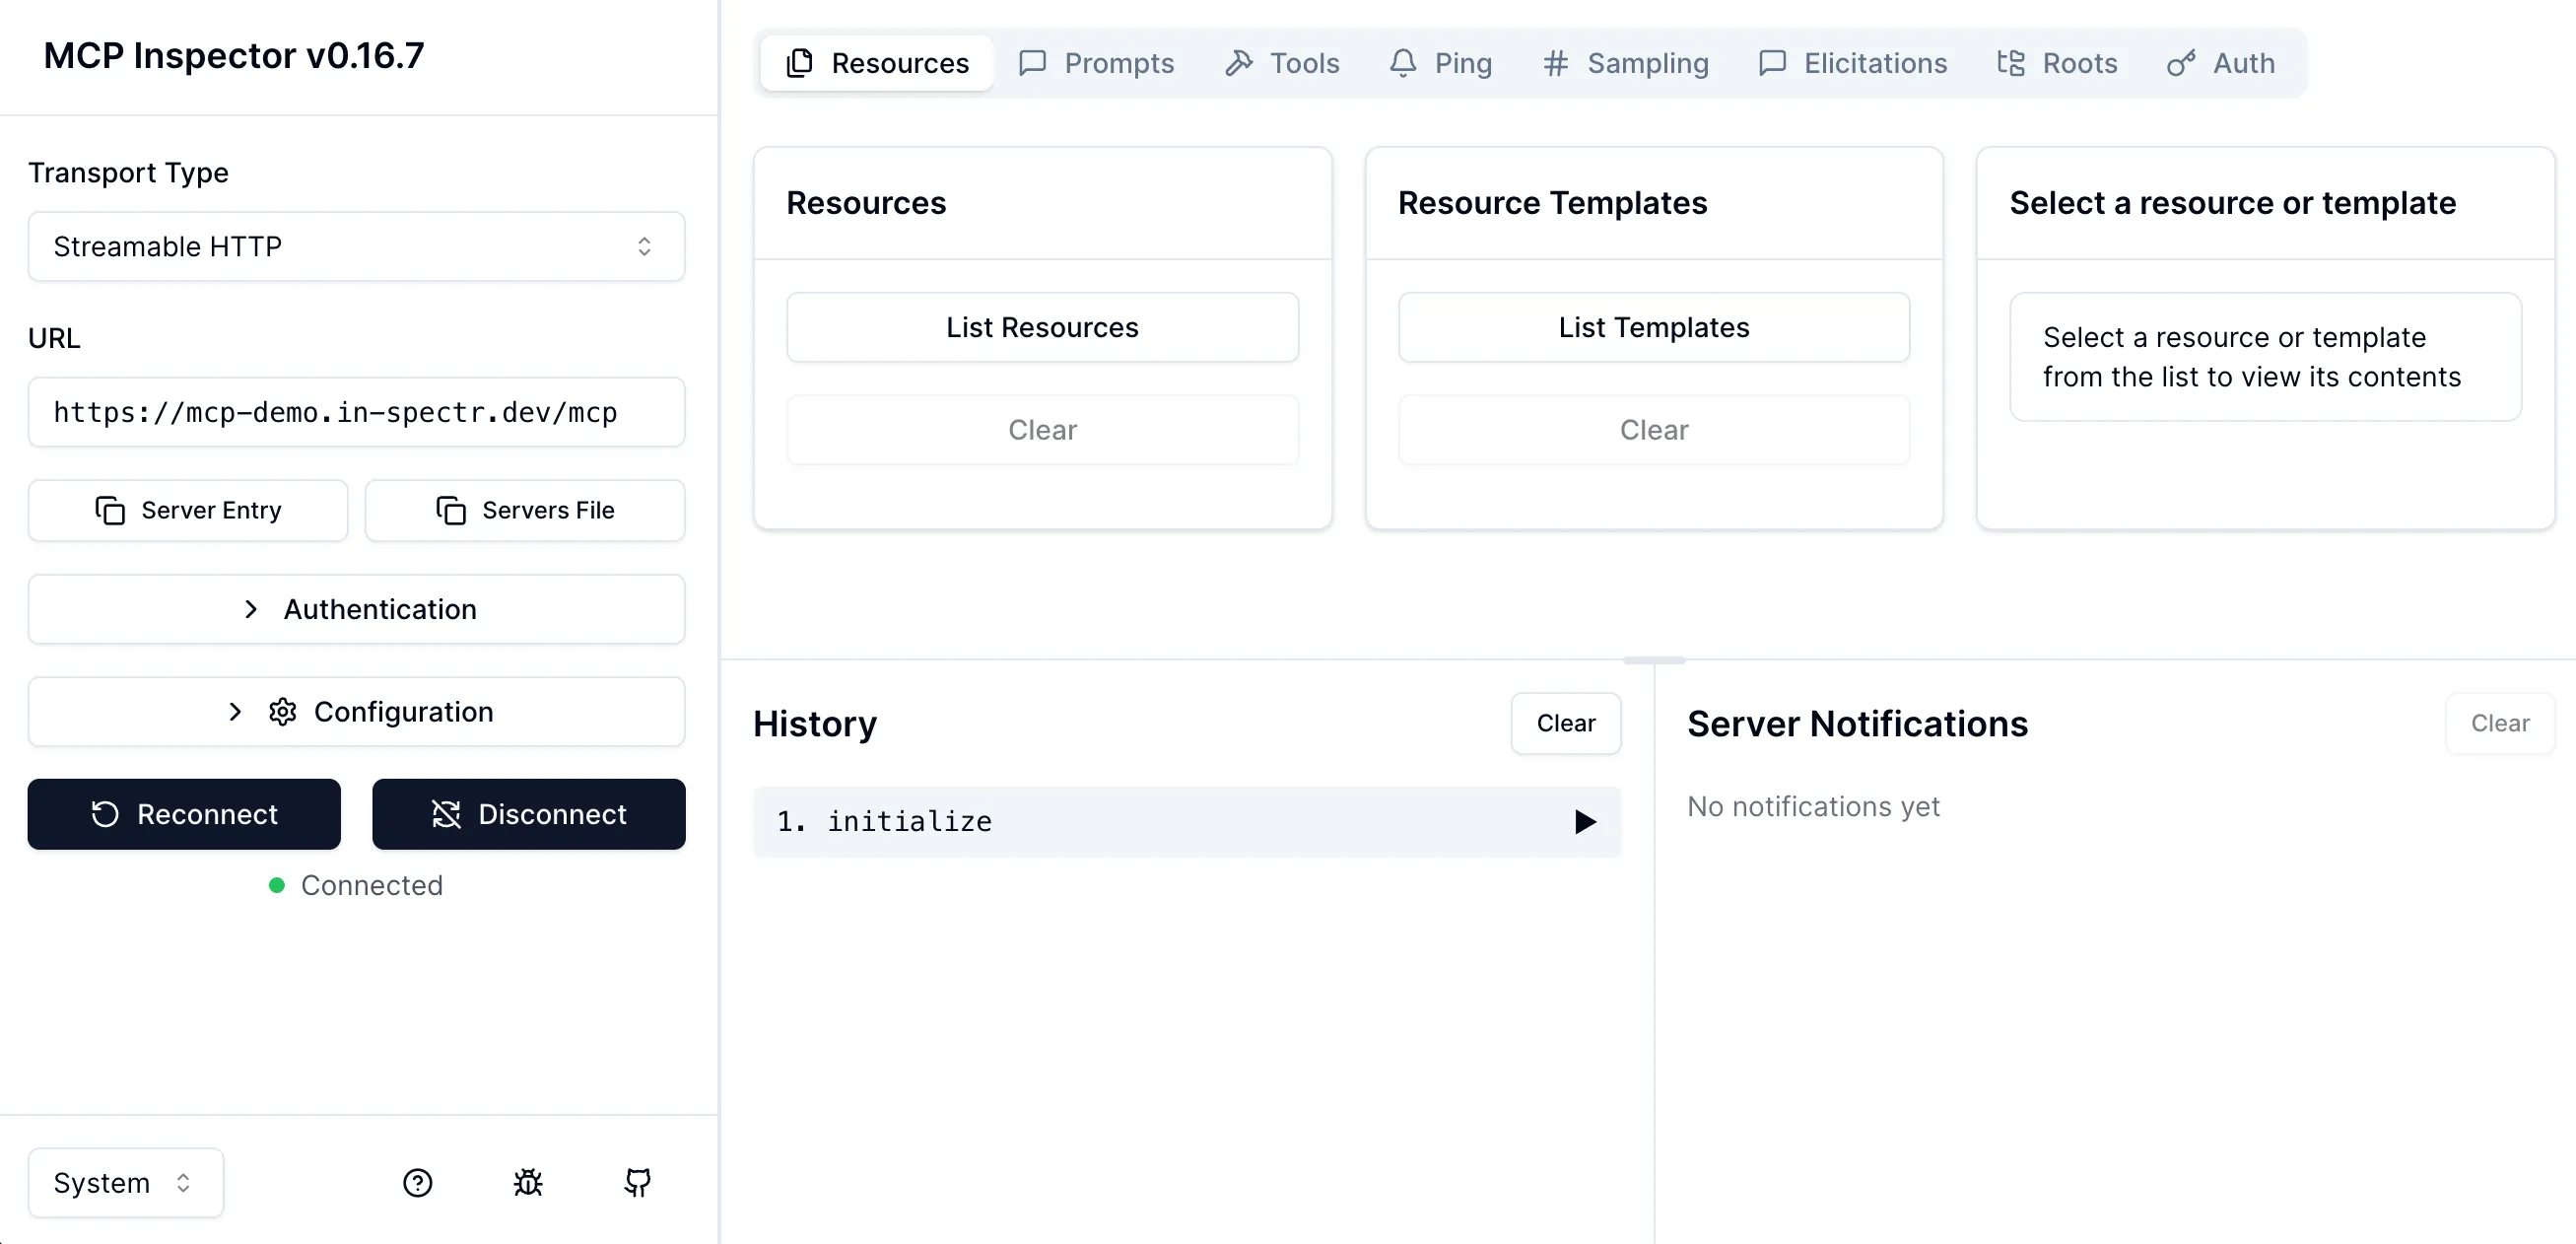
After connecting, try the List Tools button to confirm your MCP server is working correctly through Inspectr.
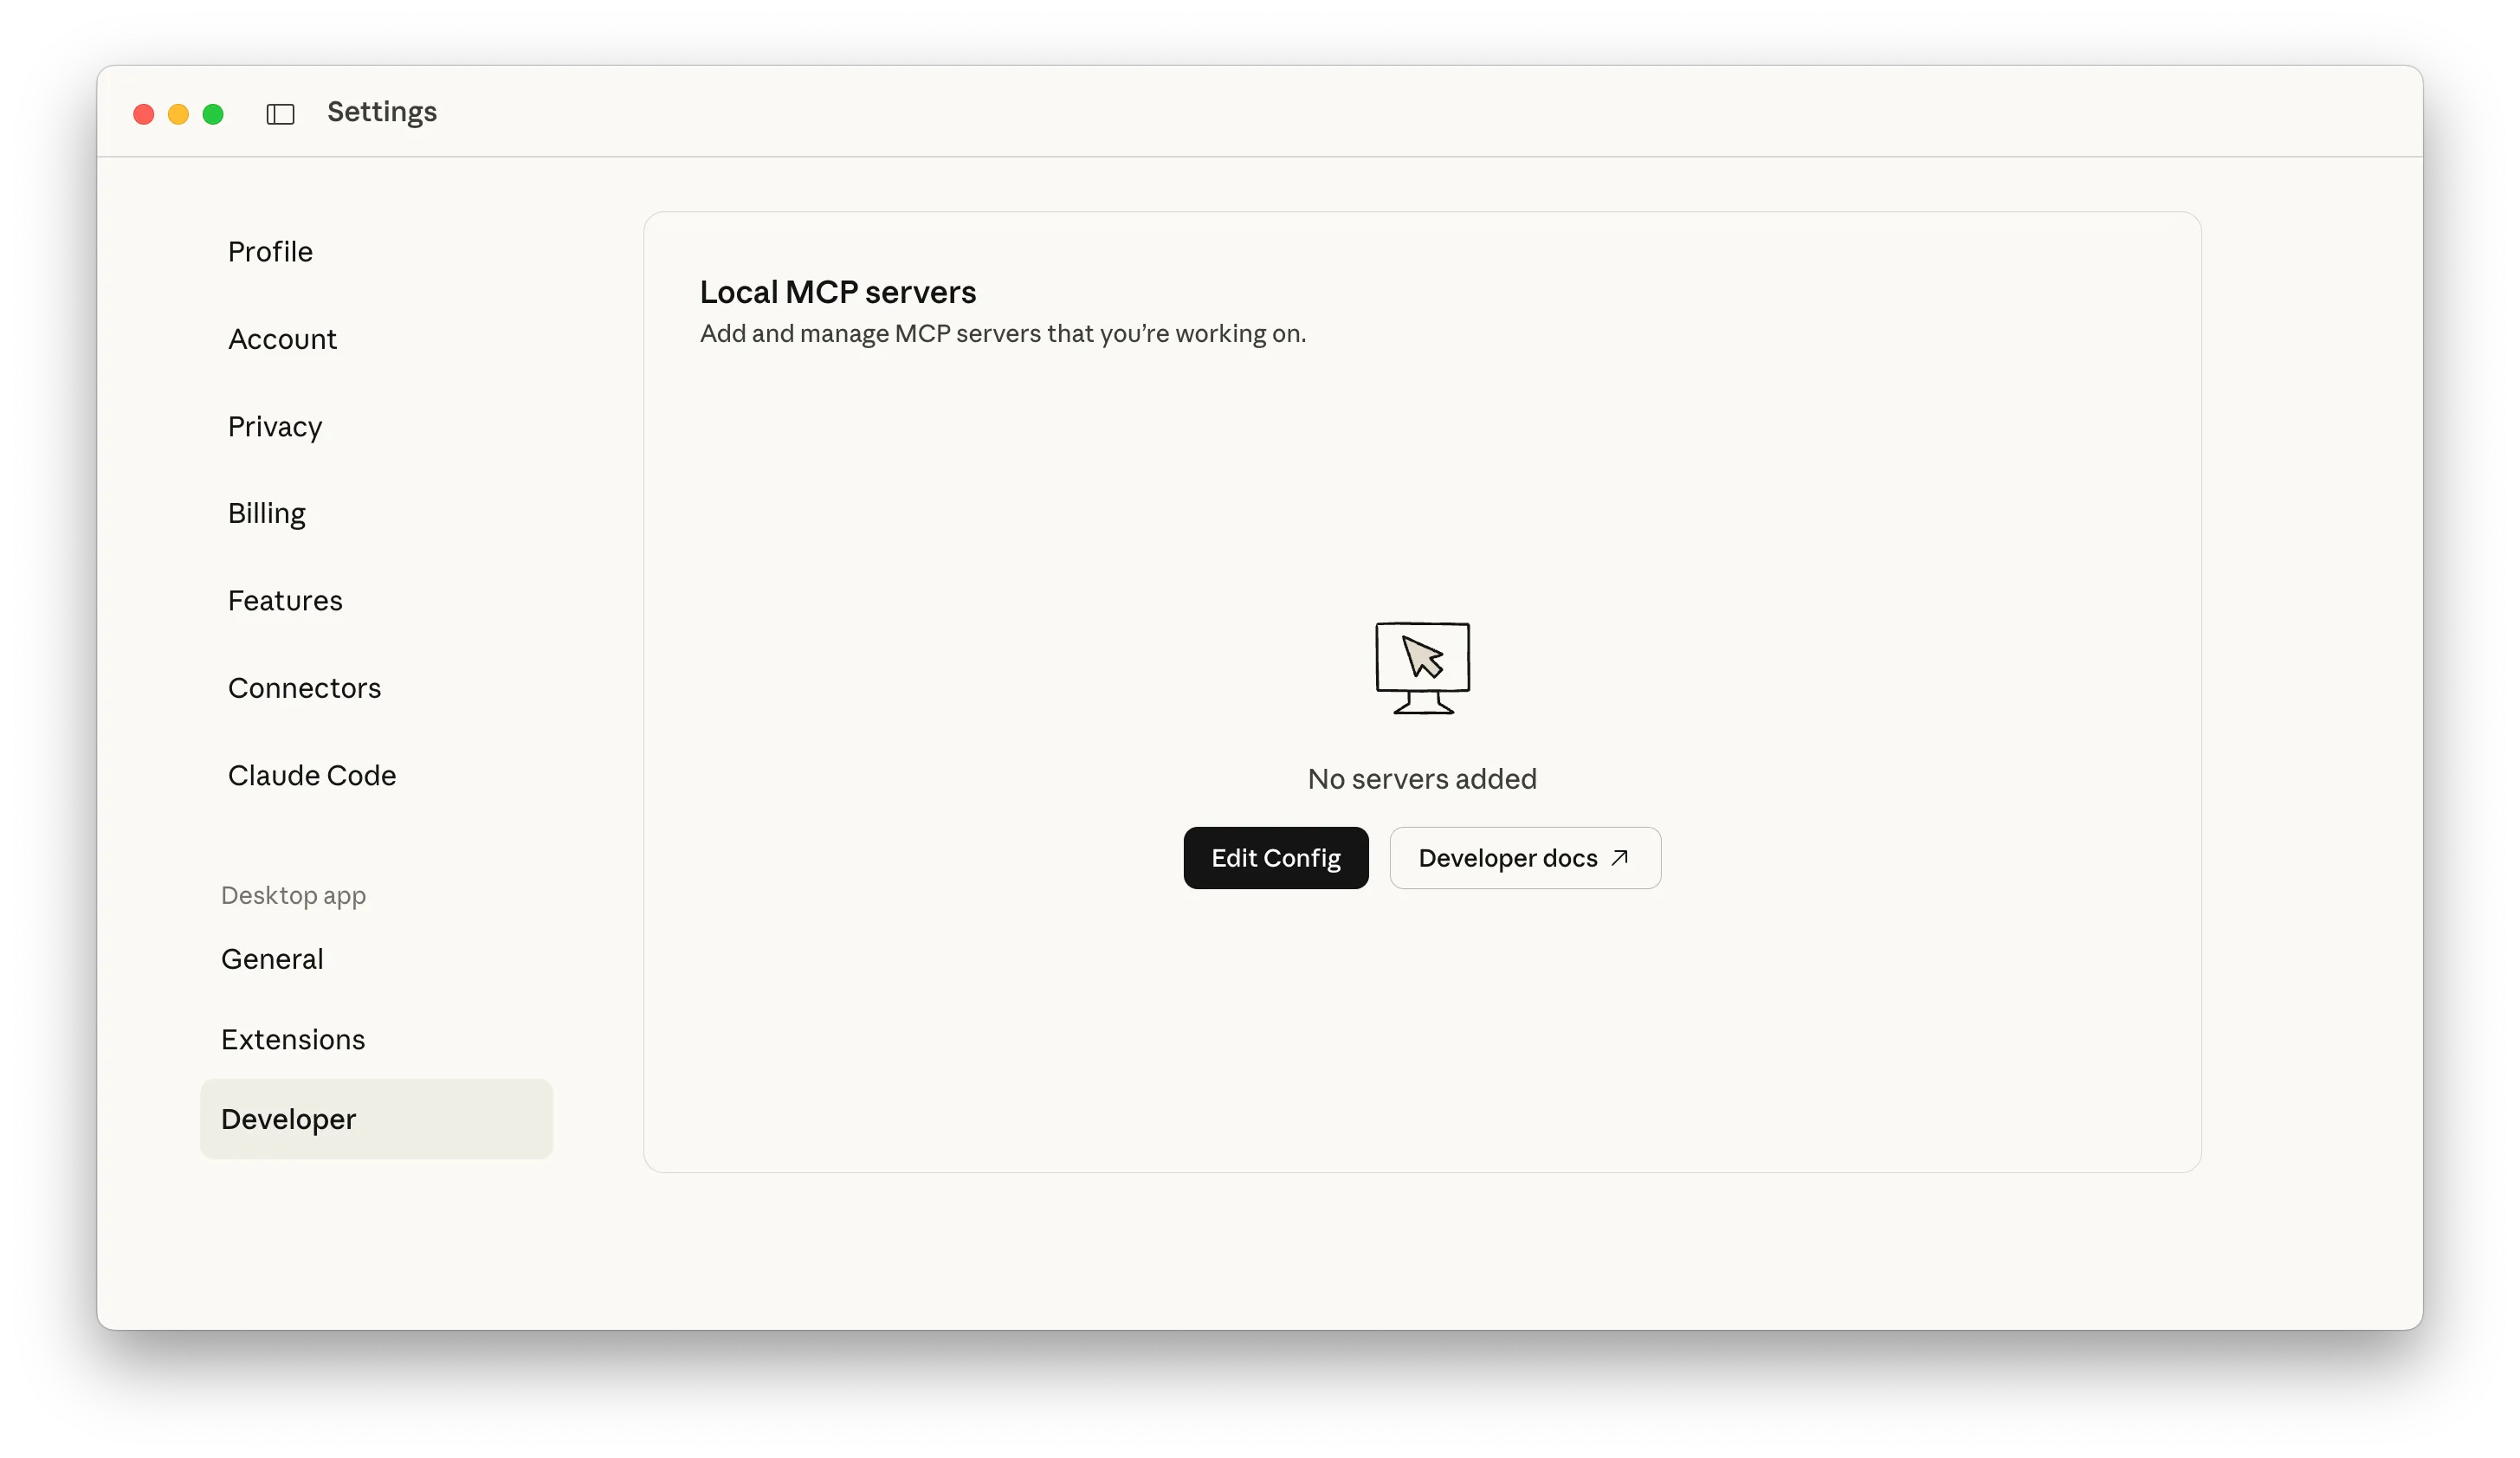
Step 4: Connect to Claude Desktop
Section titled “Step 4: Connect to Claude Desktop”Claude Desktop doesn’t support HTTP/SSE MCP servers directly, but you can combine Inspectr with mcp-remote.
Edit your Claude Desktop config. Go to “Settings"" → “Developer” → “Edit Config”:
Set the configuration details, for example:
{ "mcpServers": { "inspectr": { "command": "npx", "args": [ "mcp-remote", "https://mcp-demo.in-spectr.dev/mcp" ] } }}Save and restart Claude Desktop (Cmd/Ctrl + R).
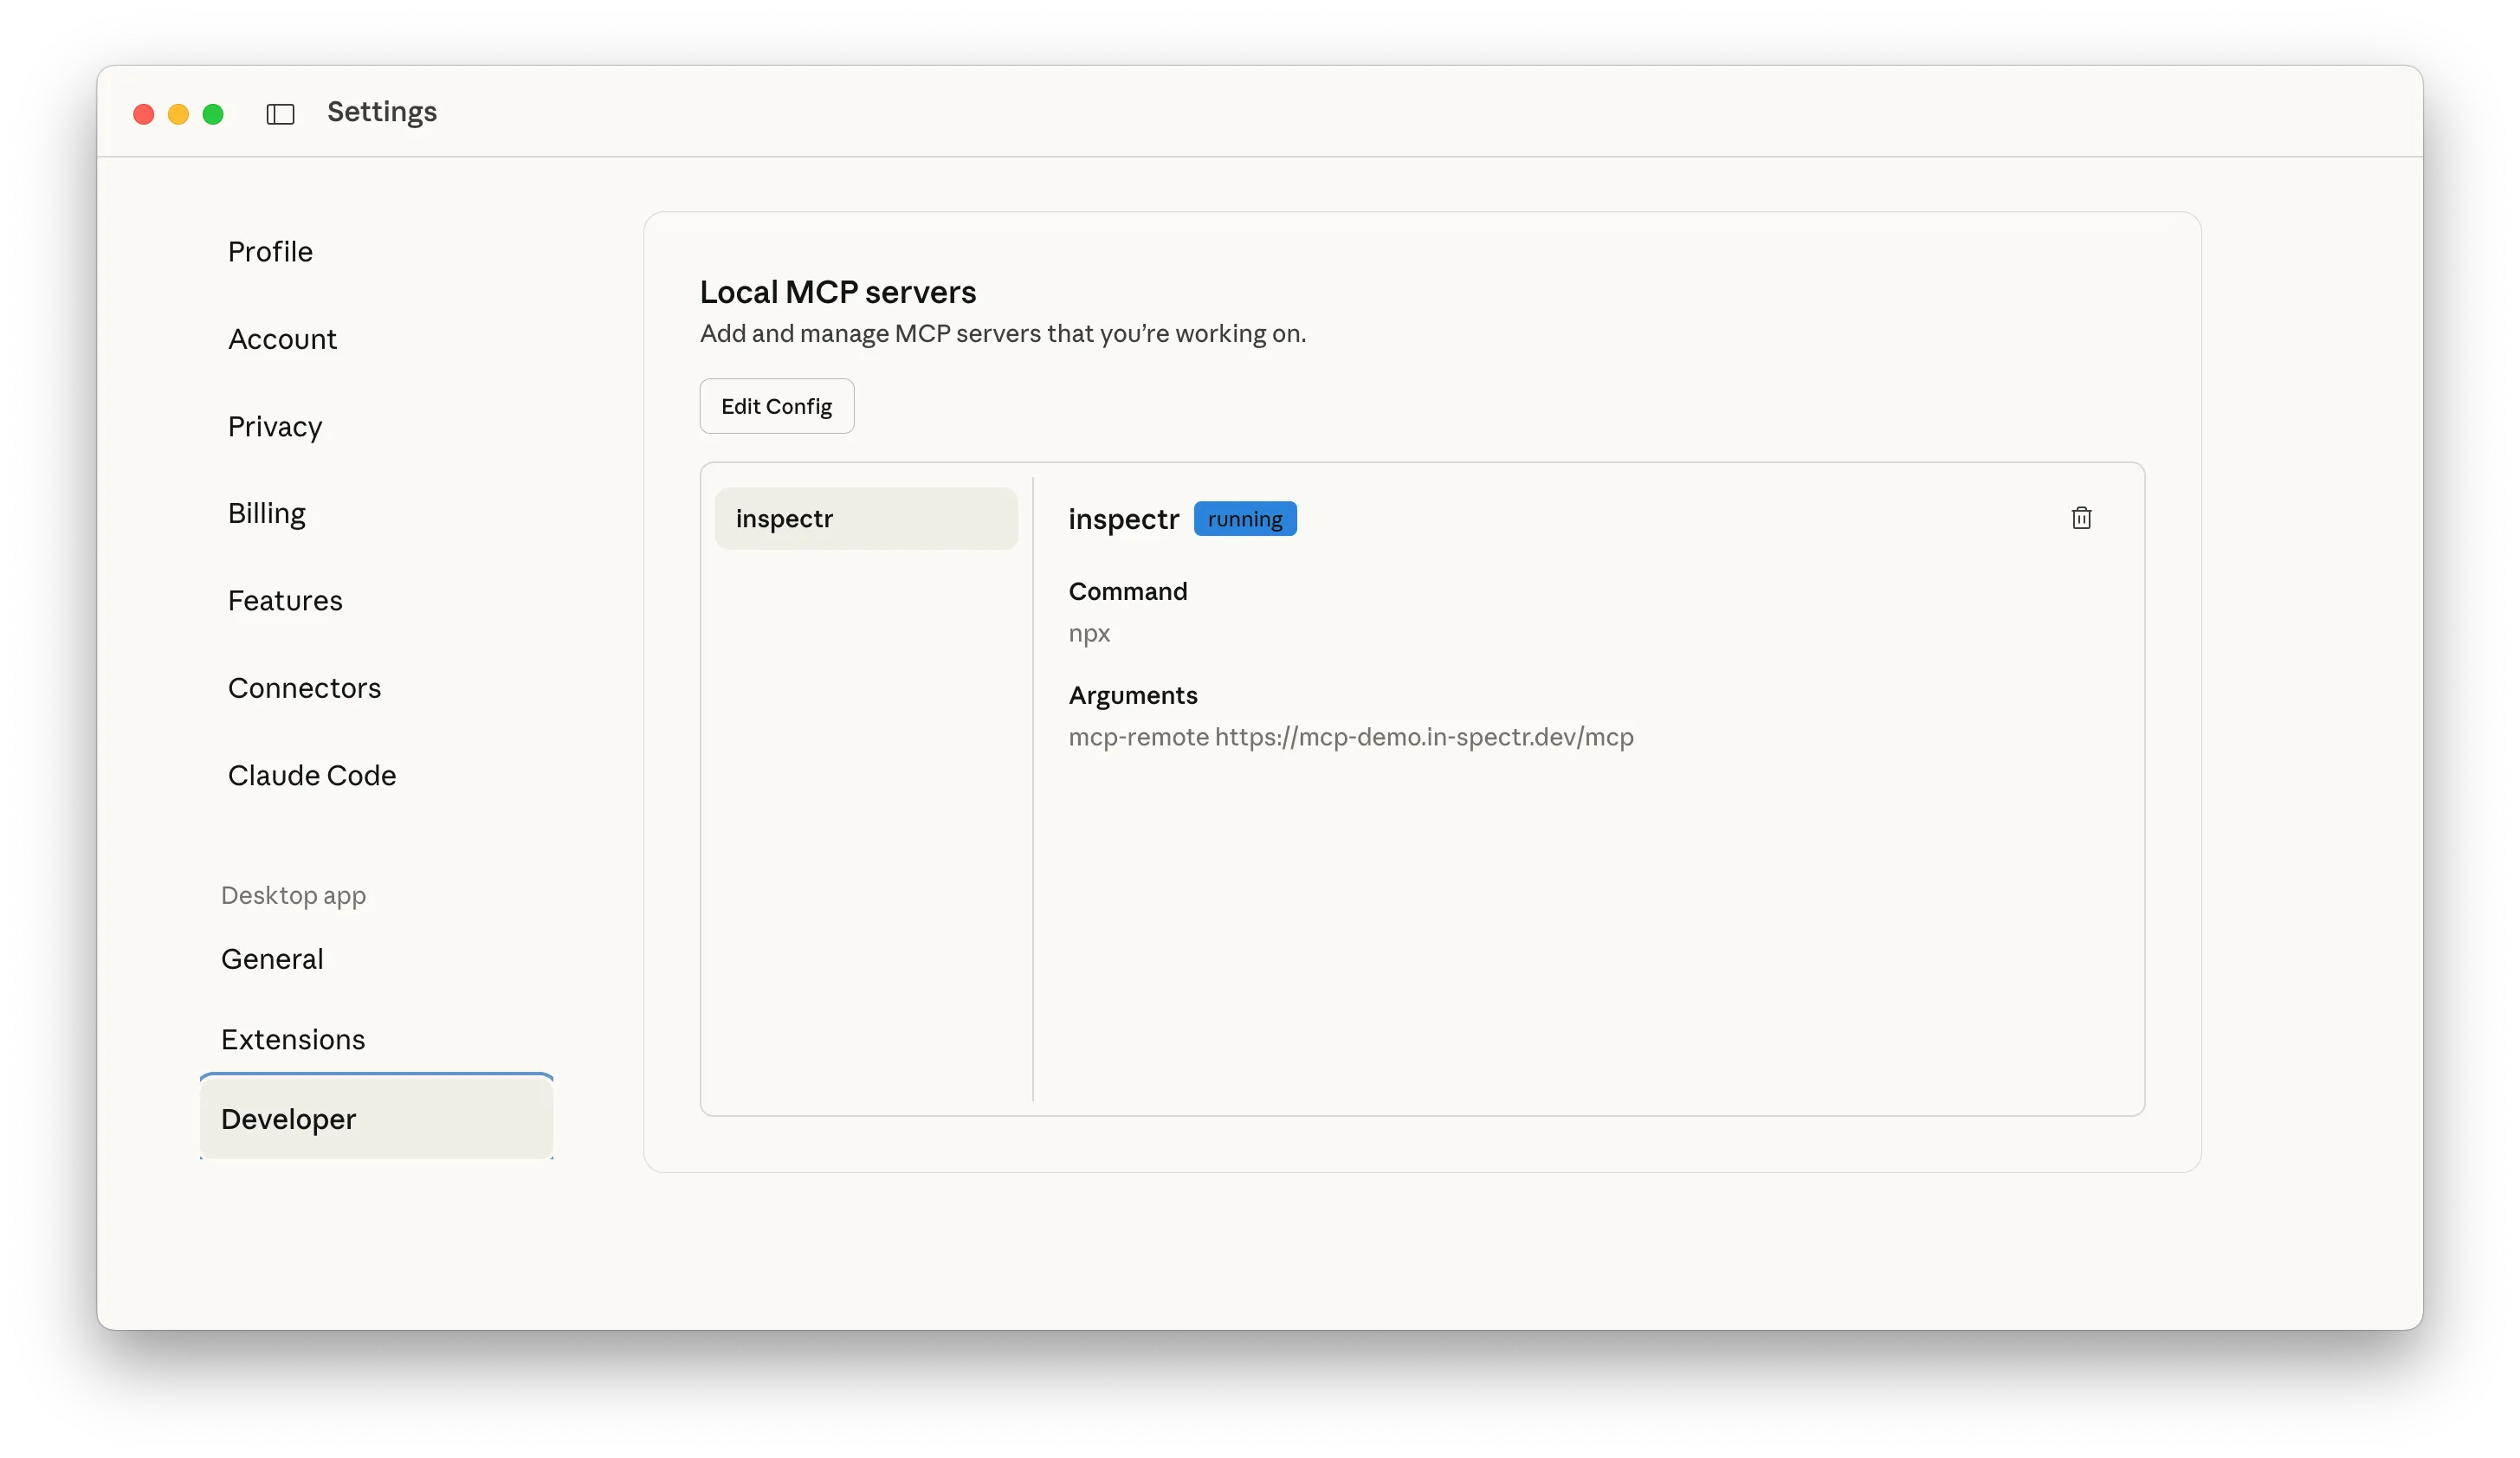
When Claude restarts, it will connect to your MCP server through Inspectr.
Once connected, if you open the “Connectors”, you will see your MCP server listed.
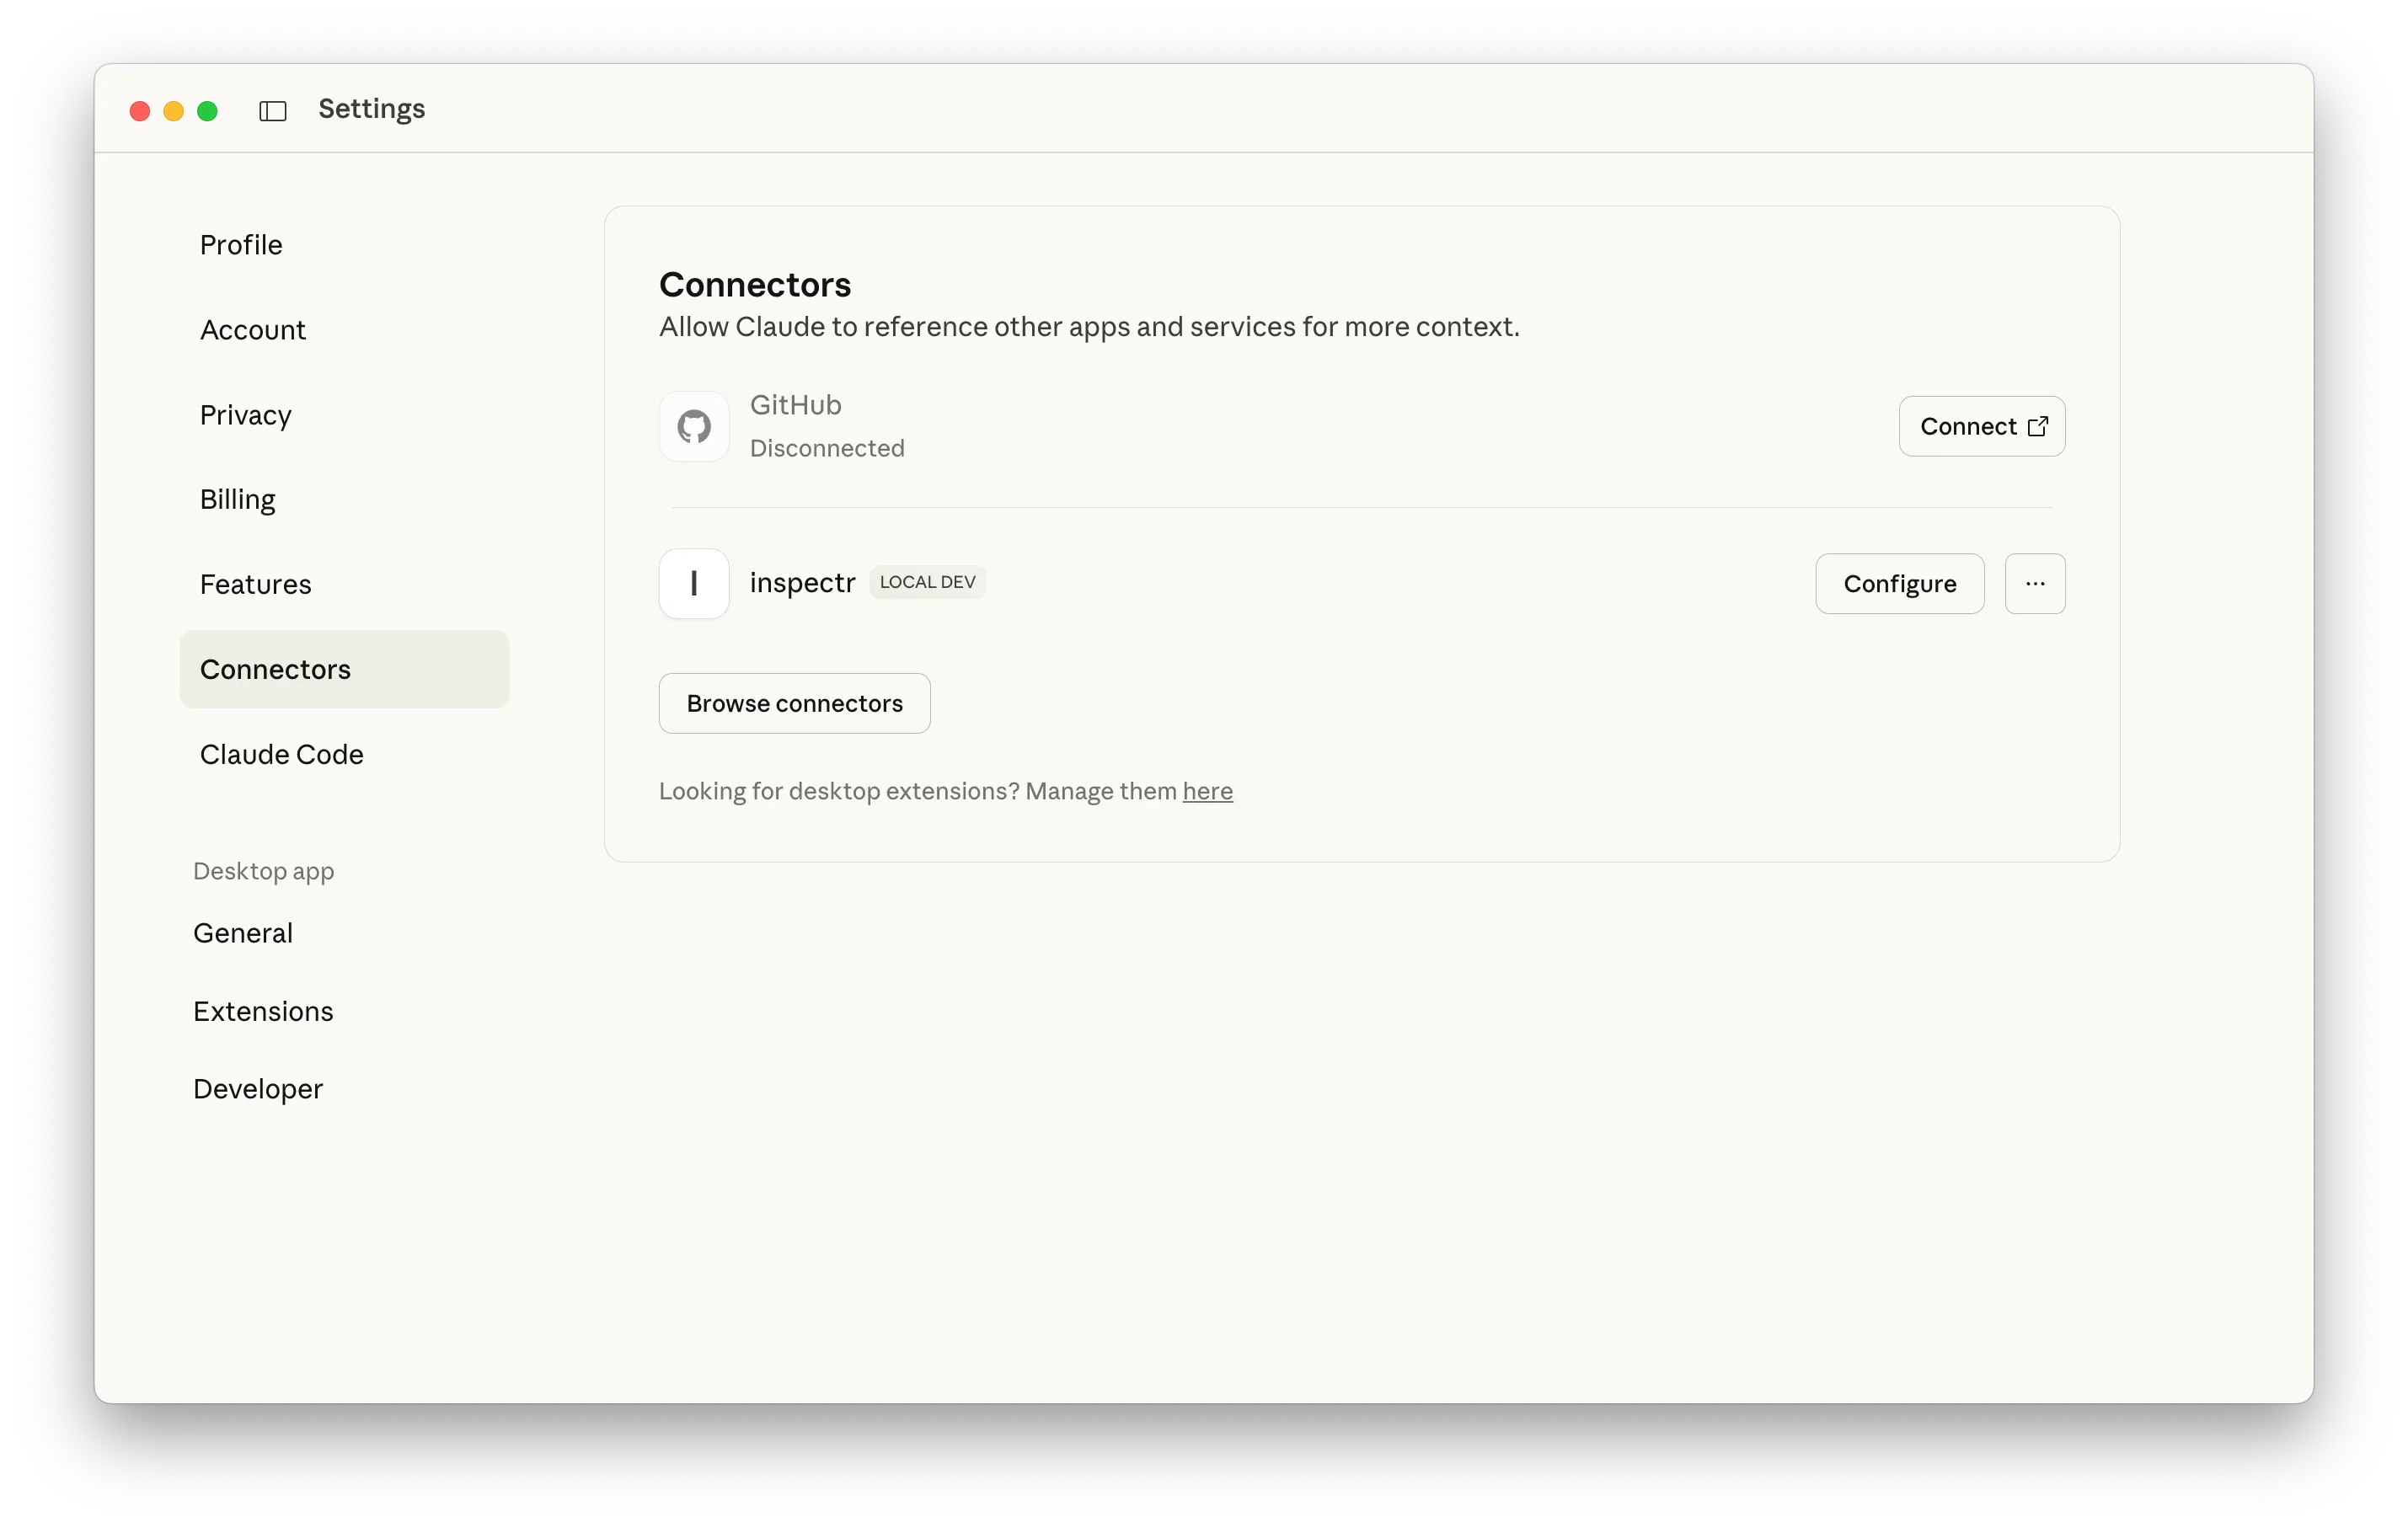
When clicking on “Configure, you can see a list of available actions of the MCP server.

Step 5: Use Inspectr in Claude Desktop
Section titled “Step 5: Use Inspectr in Claude Desktop”Once your MCP server is exposed through Inspectr, you can interact with it directly inside Claude Desktop.
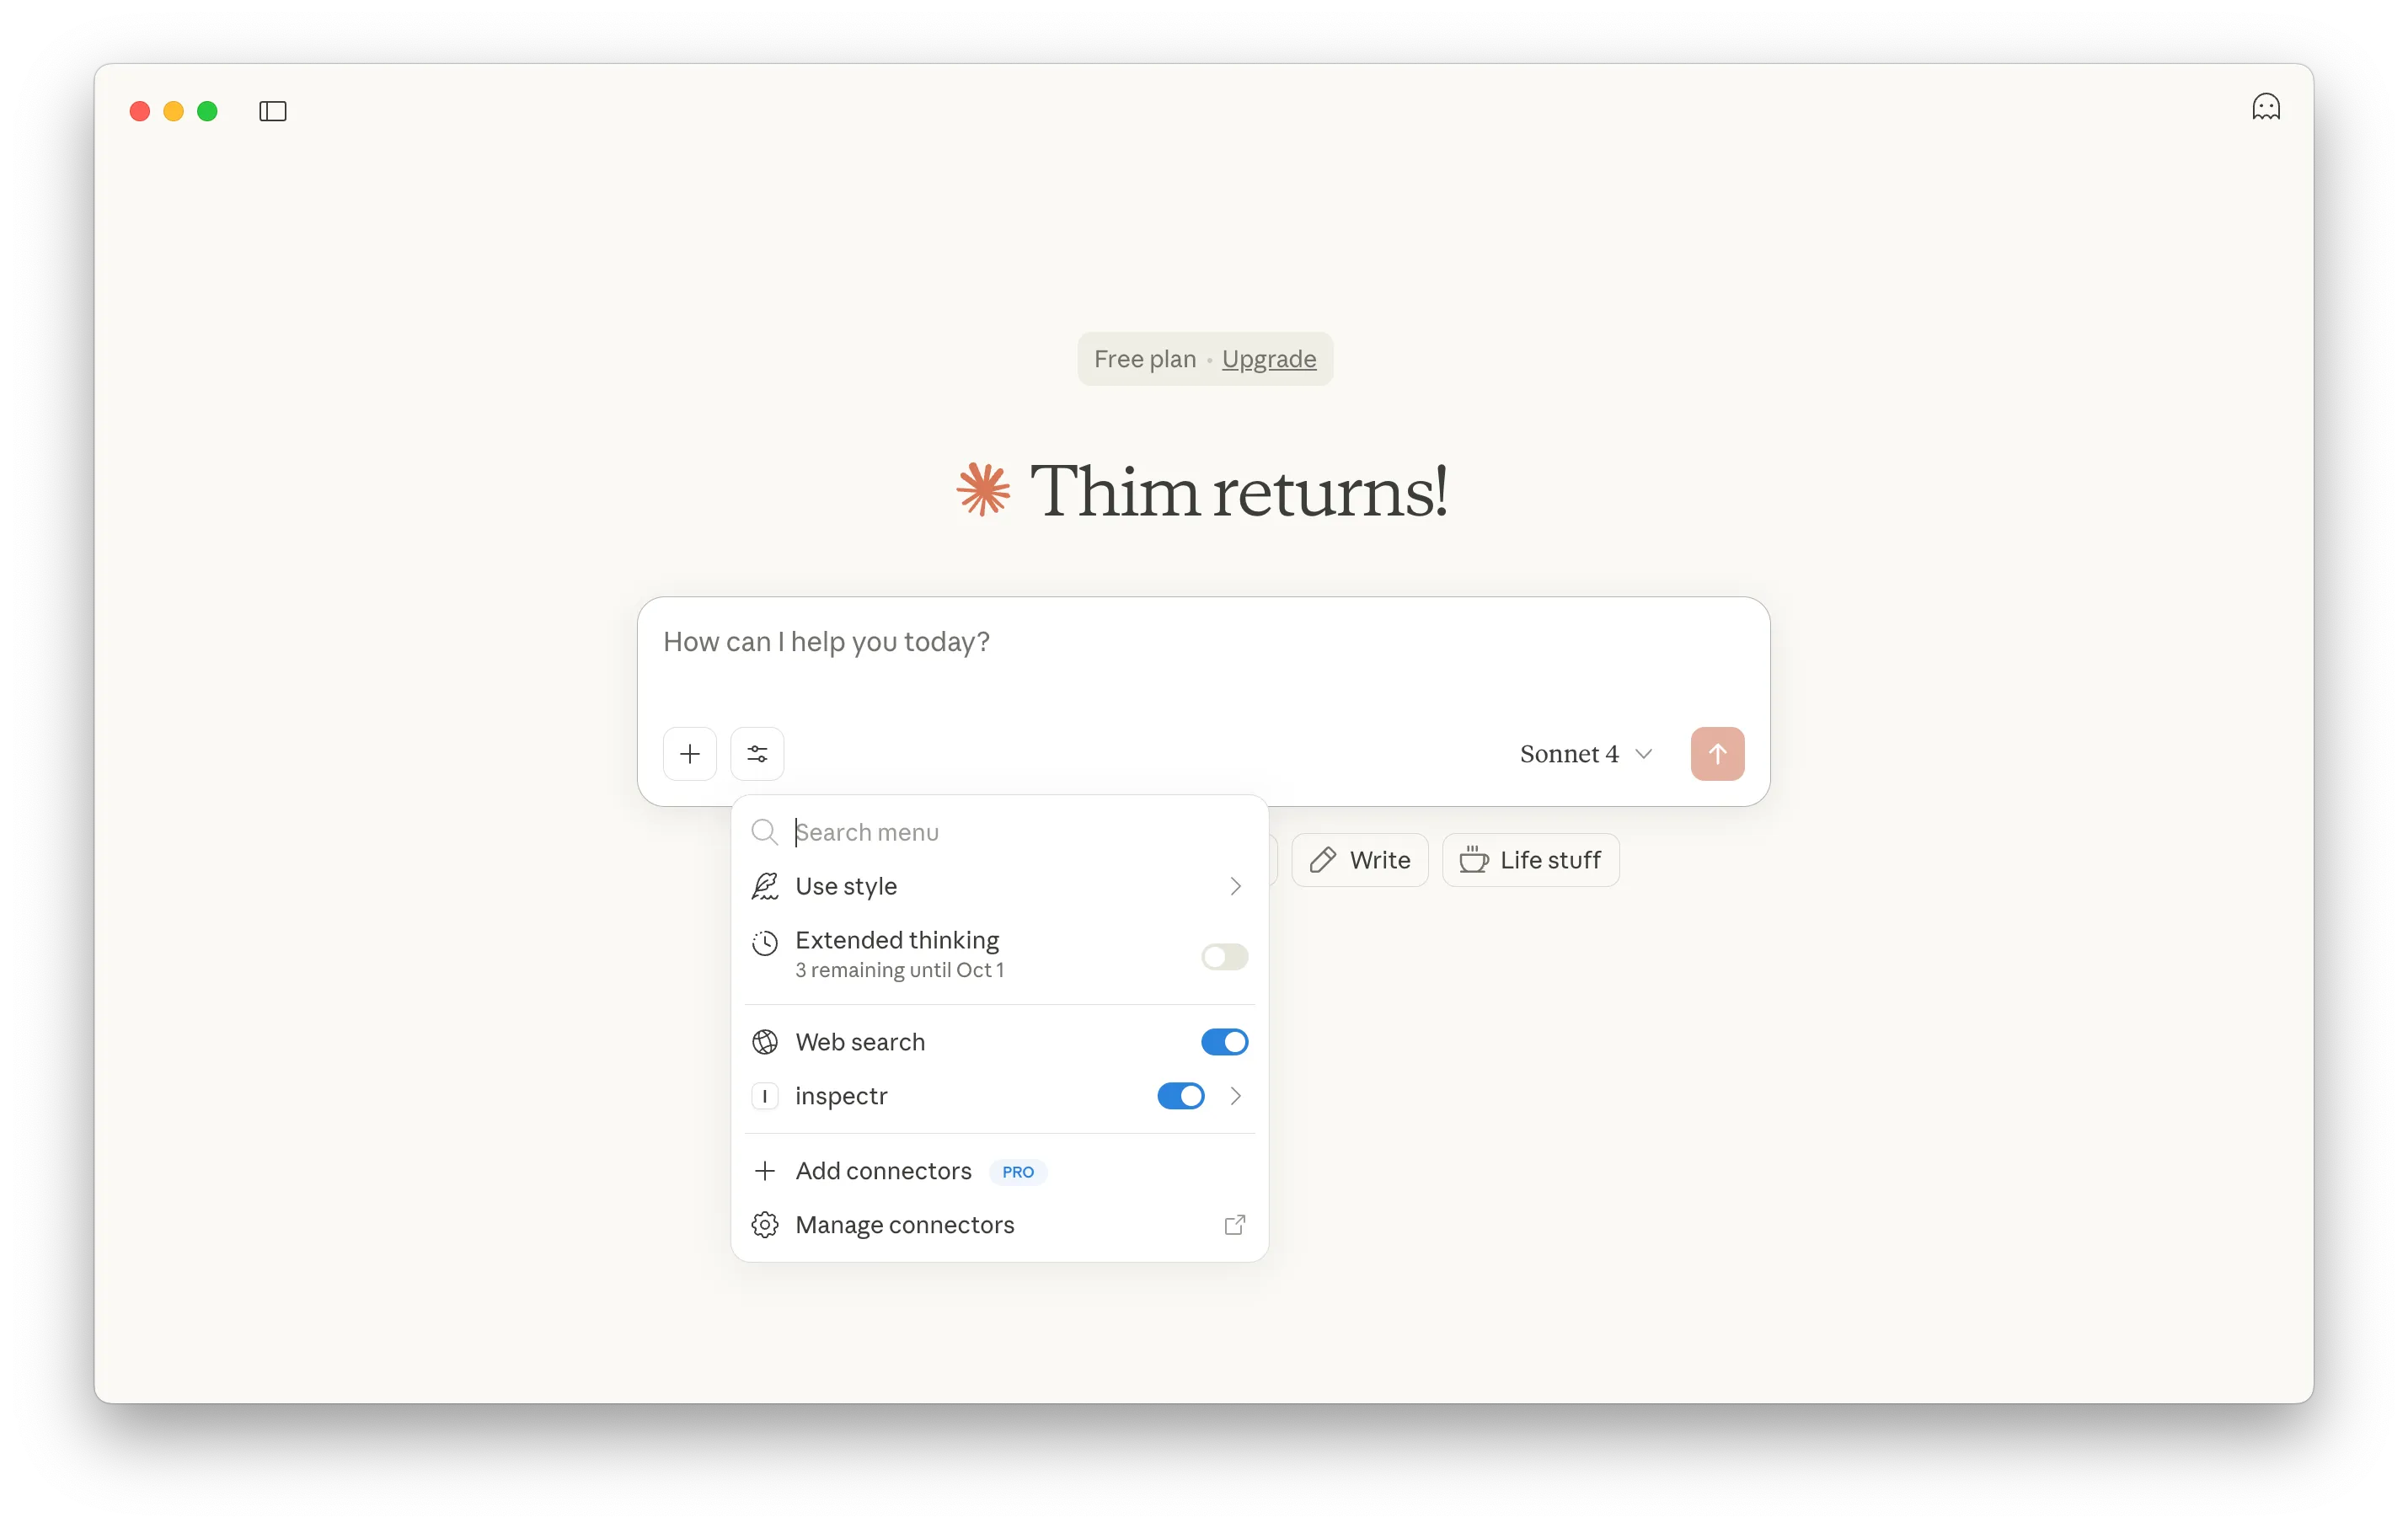
This lets you test how Claude queries your MCP server in a natural conversation flow, with results displayed as structured data or even visualizations.
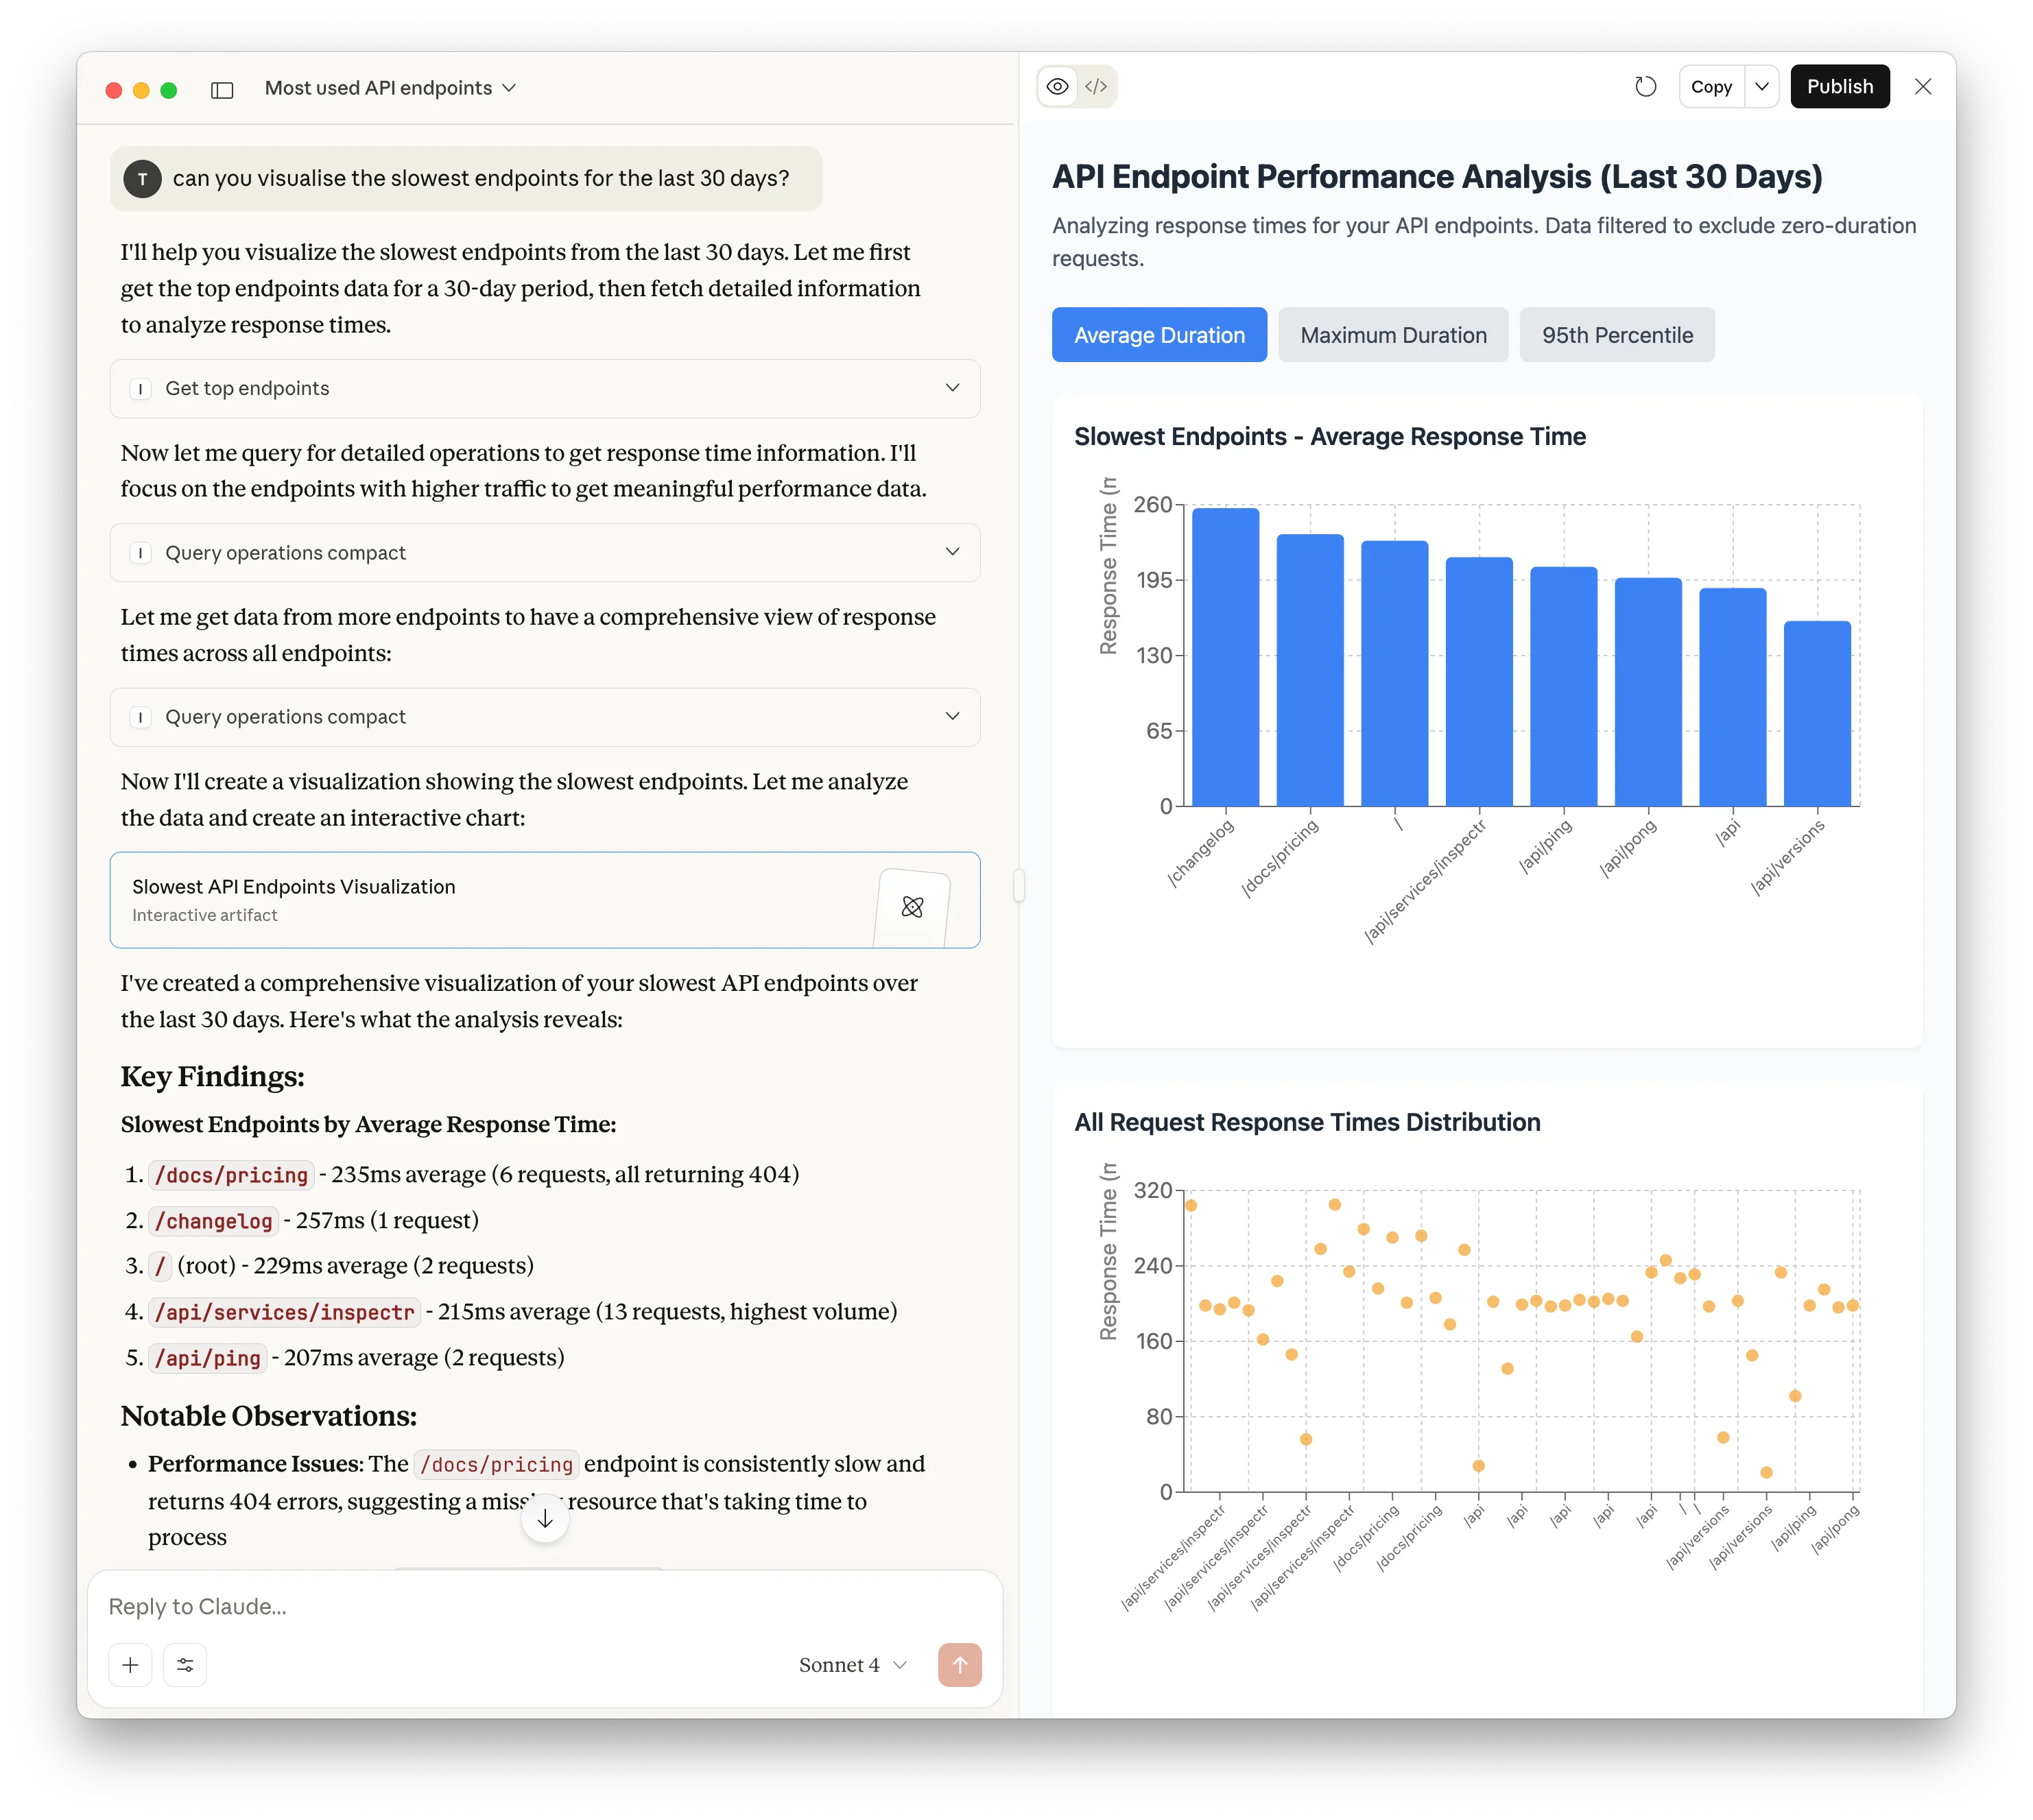
For example, let’s run a prompt that searches for the most used API endpoints:

Next we want Claude to show how the response times visually look like:
Connect to MCP Clients
Section titled “Connect to MCP Clients”Once your MCP server is running through Inspectr, you can connect it to real MCP clients. Different clients configure MCP servers differently, but the general idea is to point them at your Inspectr session URL.
Cursor
Section titled “Cursor”Cursor accepts a simple command-style configuration. Use mcp-remote to forward the Inspectr session URL:
{ "mcpServers": { "inspectr": { "command": "npx", "args": [ "mcp-remote", "https://mcp-demo.in-spectr.dev/mcp" ] } }}Windsurf
Section titled “Windsurf”Windsurf uses an mcp_config.json file. Add an entry like:
{ "mcpServers": { "inspectr": { "command": "npx", "args": [ "mcp-remote", "https://mcp-demo.in-spectr.dev/mcp" ] } }}View MCP Requests in Inspectr
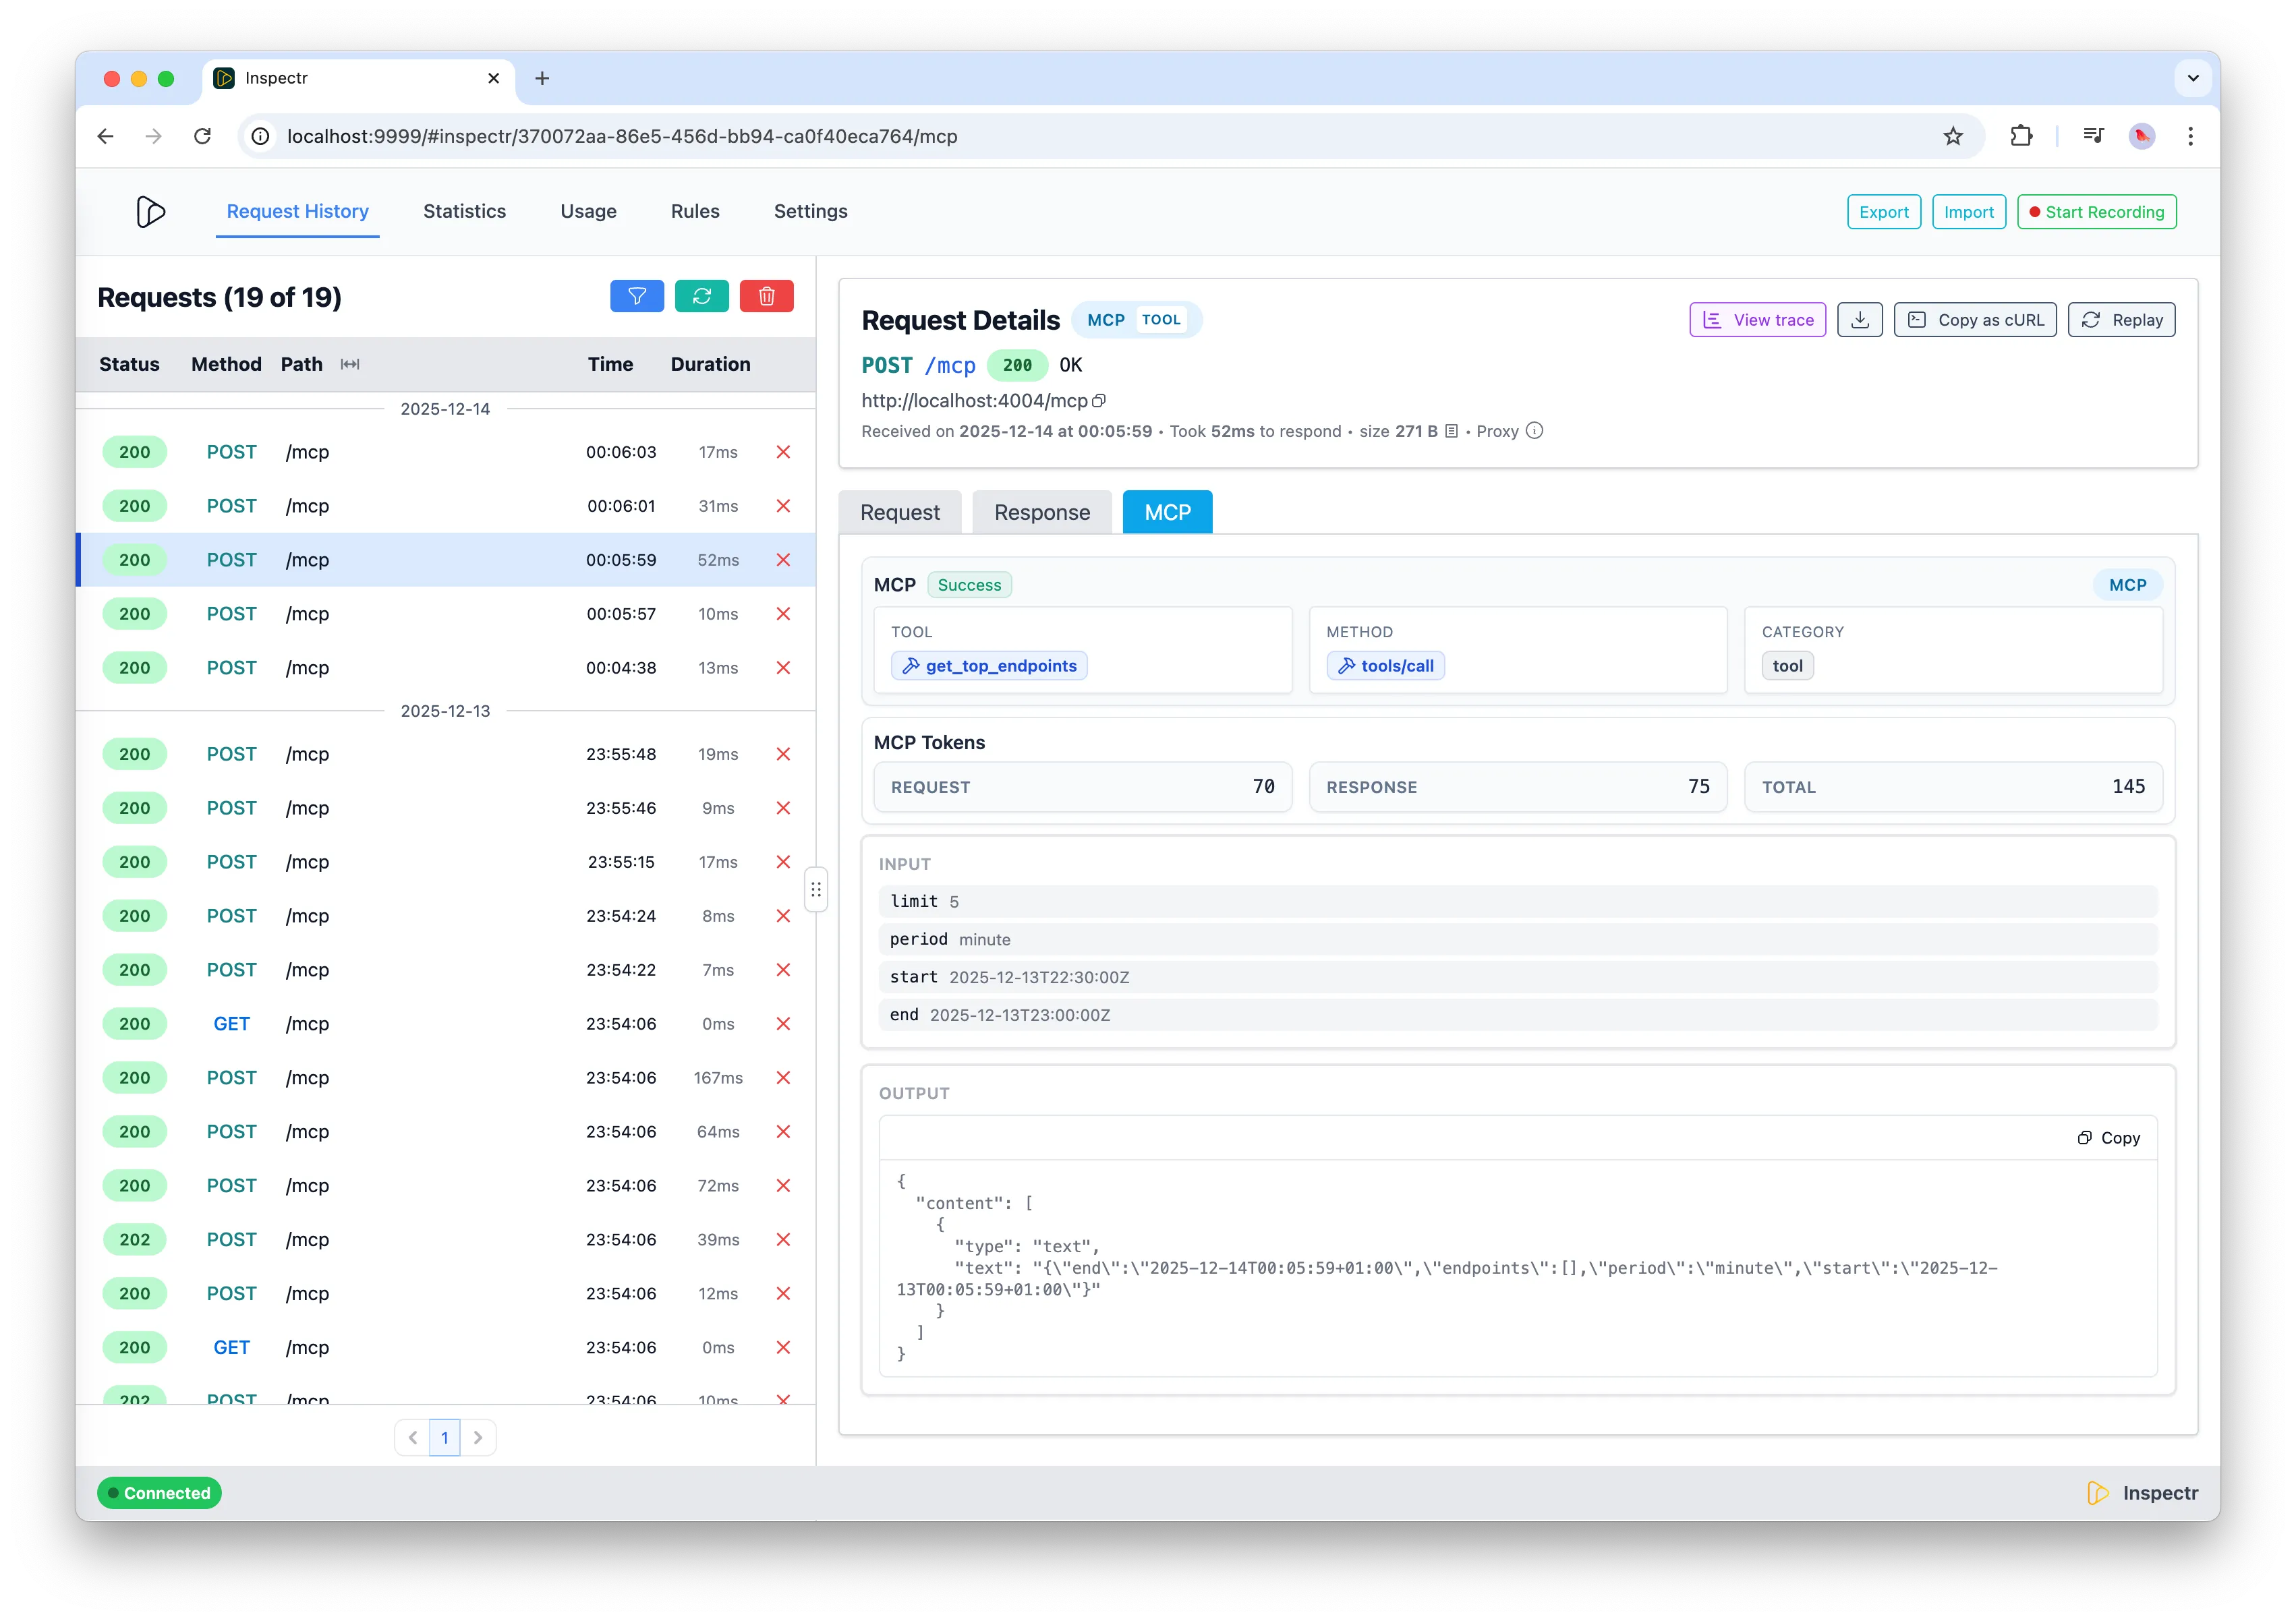
Section titled “View MCP Requests in Inspectr”When Claude Desktop interacts with your MCP server through Inspectr, every request and response is captured in Inspectr’s dashboard. This lets you see exactly what’s happening behind the scenes.
- Open http://localhost:4004 in your browser while Inspectr is running.
-
You’ll see a history of requests made by Claude, including the tools it invoked, prompts it sent, and any parameters.
-
Select a request to view the response returned by your MCP server, including result data, errors, or logs.
This makes Inspectr not just a bridge but also an observability layer for MCP development.
For more details about MCP insights, check out the MCP Insights feature.
Summary
Section titled “Summary”Inspectr makes it easy to:
- Expose any local MCP server as an HTTP/SSE endpoint.
- Test your MCP server visually with the MCP Inspector.
- Connect it to MCP clients like Claude Desktop, Cursor, or Windsurf.
- Monitor every MCP interaction in real time via the Inspectr dashboard.
MCP Insights →