Installation
Getting started with Inspectr is simple. The table below summarizes the different installation methods. Pick the one that best fits your workflow and follow the steps after the table.
| Method | Best for |
|---|---|
| npx | Quick one-off runs without installing |
| Homebrew | macOS users who want easy updates |
| npm | Cross-platform installation using npm for Windows, macOS, Linux |
| Binary | Cross-platform installation using the binaries for Windows, macOS, Linux |
| Docker | Containerized deployments using pre-built images from GitHub Container Registry |
Quick installation (npx)
Section titled “Quick installation (npx)”Use npx to try Inspectr without installing anything globally:
npx @inspectr/inspectr --backend=http://localhost:3000- Downloads the latest version on each run
- Great for quick experiments or CI jobs
- The UI becomes available at http://localhost:4004
Full installation
Section titled “Full installation”Install Inspectr permanently using Homebrew, npm, or a standalone binary.
Homebrew (macOS)
Section titled “Homebrew (macOS)”Install Inspectr on macOS using package Manager Homebrew:
brew tap inspectr-hq/inspectrbrew install inspectrRun Inspectr:
inspectr --backend=http://localhost:3000- Works on macOS
brew upgrade inspectrkeeps it up to date
Use npm to install Inspectr on Windows, macOS and Linux.
npm install -g @inspectr/inspectrRun Inspectr like this:
inspectr --backend=http://localhost:3000- Installs Inspectr globally via the Node package manager.
- Update later using
npm update -g @inspectr/inspectr
Binary
Section titled “Binary”Download the binary for your platform from GitHub Releases:
./inspectr --backend=http://localhost:3000💡 Tip: Make sure the binary is executable (
chmod +x ./inspectr) if needed.
- Binaries are available for macOS, Linux, and Windows.
- Just download the appropriate binary, extract it, and run it
Docker
Section titled “Docker”Run Inspectr as a container using images hosted on GitHub Container Registry:
docker pull ghcr.io/inspectr-hq/inspectr:latestdocker tag ghcr.io/inspectr-hq/inspectr:latest inspectrdocker run --rm -p 4004:4004 -p 8080:8080 inspectr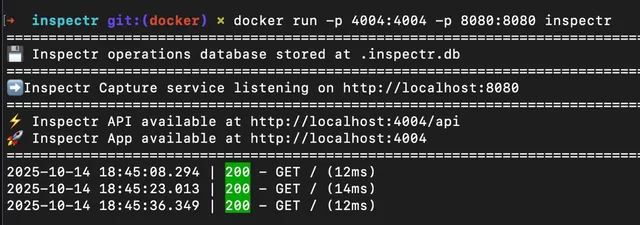
-p 4004:4004exposes the UI so you can open Inspectr in your browser at http://localhost:4004.-p 8080:8080exposes the API endpoint for testing with your preferred API client.- The container runs as a single service, making it easy to integrate Inspectr into CI pipelines or local development environments.
Docker Compose
Section titled “Docker Compose”You can also run Inspectr using Docker Compose for easier configuration and to persist data across runs:
version: "3.9"
services:  inspectr:    image: ghcr.io/inspectr-hq/inspectr:latest    container_name: inspectr    ports:      - "4004:4004" # Inspect App (http://localhost:4004)      - "8080:8080" # Proxy Port (http://localhost:8080)    volumes:      - inspectr-data:/data    command: >      inspectr      --listen=:8080      --app-port=4004    restart: unless-stopped
volumes:  inspectr-data:
Then start Inspectr with:
docker compose up -dInspectr will now be accessible at:
UI → http://localhost:4004 PROXY → http://localhost:8080
To stop and remove containers, networks and volumes:
docker compose downNext step
Section titled “Next step”You’re ready to run Inspectr and start debugging API traffic in seconds.
Explore the configuration options to customize your Inspectr settings.