Exposing a MCP Server to OpenAI
Ever tried testing and debugging a local MCP server in ChatGPT or Claude? It’s tricky to connect the LLM with your local MCP server.
With Inspectr, you can expose your local MCP with one simple command:
inspectr --backend=http://localhost:3000 --exposeYour local MCP server is now publicly available and ready to connect with ChatGPT. And as an extra handy bonus, you can see exactly how the LLM interacts with it in the Inspectr App.
Unlock MCP in ChatGPT with Inspectr
Section titled “Unlock MCP in ChatGPT with Inspectr”Since the summer of 2025, you can enable “Custom Connectors” in Developer Mode in ChatGPT to use remote MCP Servers!
With the MCP (Model Context Protocol), you can connect proprietary systems and apps to OpenAI, allowing you to search, reason, and act with any local MCP server in ChatGPT, right alongside web results and built-in connectors.
Inspectr makes it simple to expose your MCP server securely and inspect how ChatGPT uses your MCP tools, prompts, and resources.
What You’ll Learn
Section titled “What You’ll Learn”- Enable Developer Mode in ChatGPT
- Expose your local MCP server using Inspectr
- Connect it to ChatGPT as a “custom connector”
- Use your MCP server directly in ChatGPT conversations
- Inspect requests and responses in the Inspectr UI
Prerequisites
Section titled “Prerequisites”- A running MCP-compatible server (more info in the OpenAI MCP docs)
- Inspectr installed (Install Guide →)
Step 1: Start Your MCP Server
Section titled “Step 1: Start Your MCP Server”Make sure your MCP server is running locally, using the “streamable http” as transport. For this example we run it on port 3000.
mcp-server --port 3000Step 2: Expose MCP via Inspectr
Section titled “Step 2: Expose MCP via Inspectr”Run Inspectr with the --expose flag:
inspectr \ --backend=http://localhost:3000 \ --expose \ --channel=mcp-demo \ --channel-code=mcpserver123
Your MCP server is now available at:
https://mcp-demo.in-spectr.dev/mcp- Inspectr listens on port
8080(use--listen=to change this) - Forwards traffic to your MCP server on port
3000 - Captures and displays traffic in the App UI at http://localhost:4004
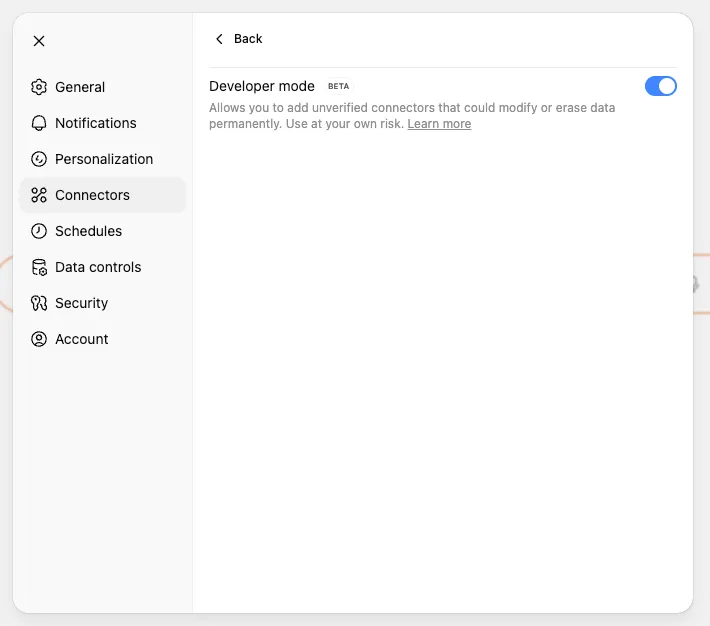
Step 3: Enable Developer Mode in ChatGPT
Section titled “Step 3: Enable Developer Mode in ChatGPT”Go to “Settings” → “Connectors” → “Advanced settings”
and enable Developer Mode.
Step 4: Add a Custom Connector
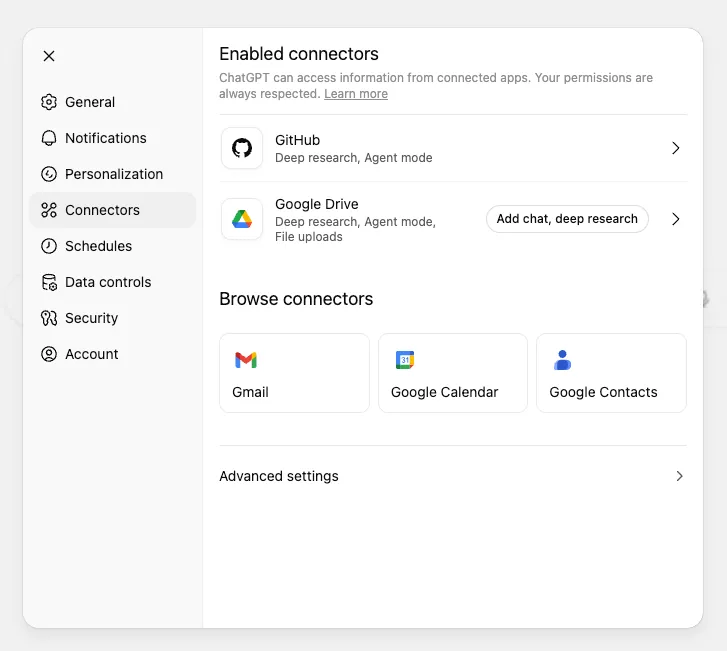
Section titled “Step 4: Add a Custom Connector”In ChatGPT, go to “Settings” → “Connectors”
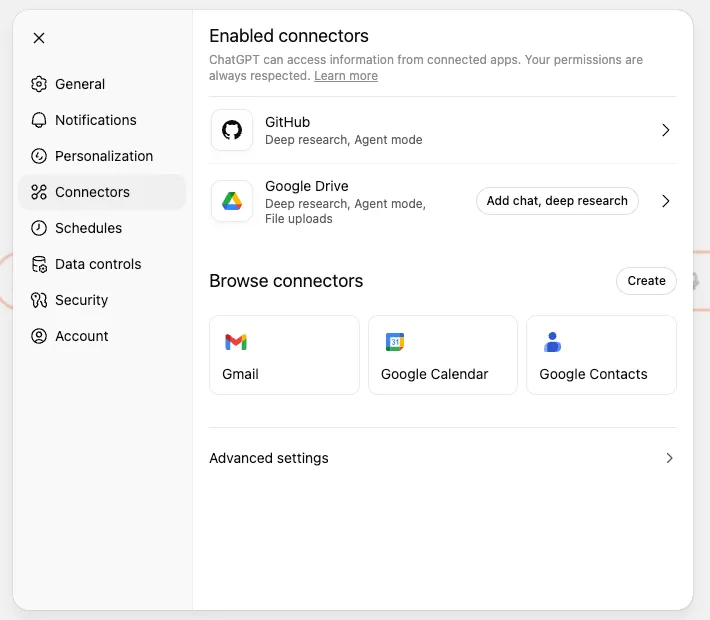
After enabling Developer Mode, click “Create” to add a new connector.
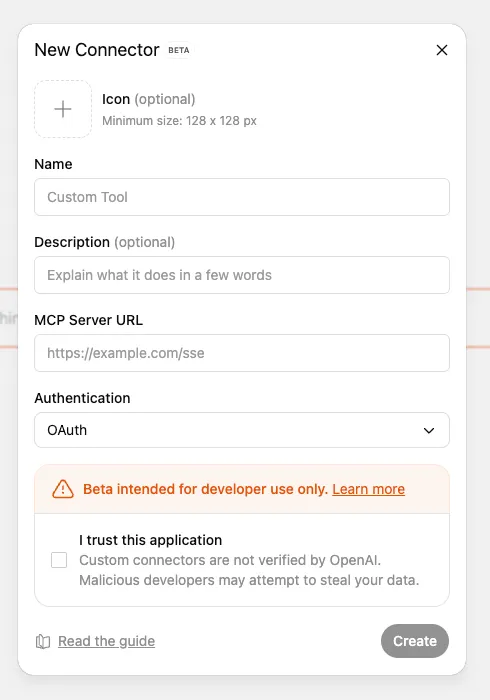
Fill in the connector details, for example:
- Name: Inspectr
- Description: Inspectr MCP Server
- MCP Server URL:
https://mcp-demo.in-spectr.dev/mcp - Authentication: “No authentication” (or set to the method your MCP server requires)
- Tick “I trust this application”
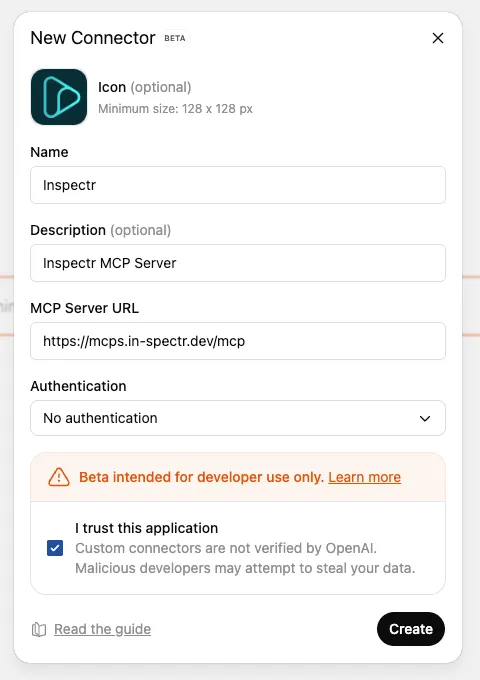
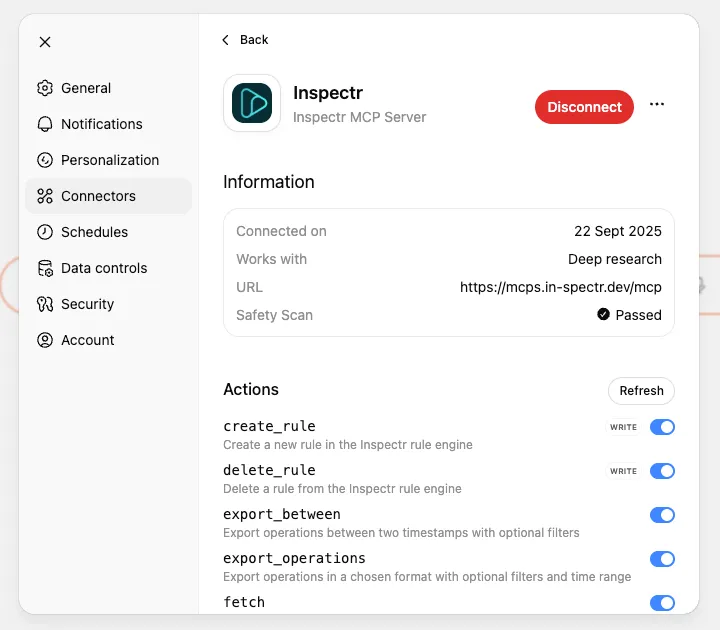
Press “Create” to save the connector. ChatGPT will then attempt to connect to your MCP server.
Once connected, you should see connection details and a list of available actions.
Step 5: Use Inspectr in ChatGPT
Section titled “Step 5: Use Inspectr in ChatGPT”Once connected, you can select the connector, and the MCP server will appear under “Use tools” in the composer.
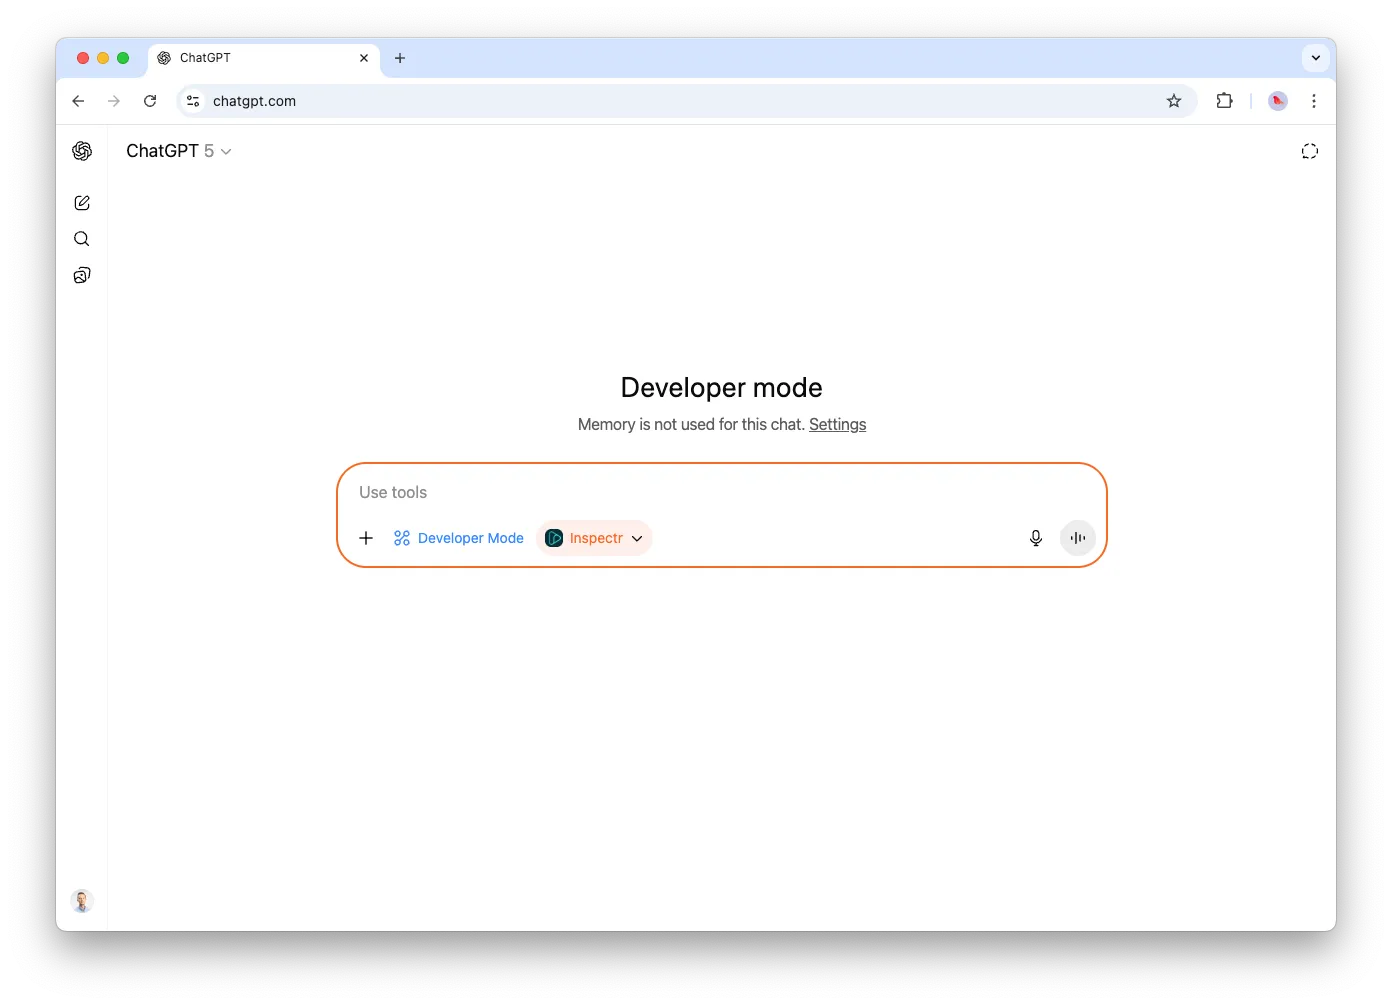
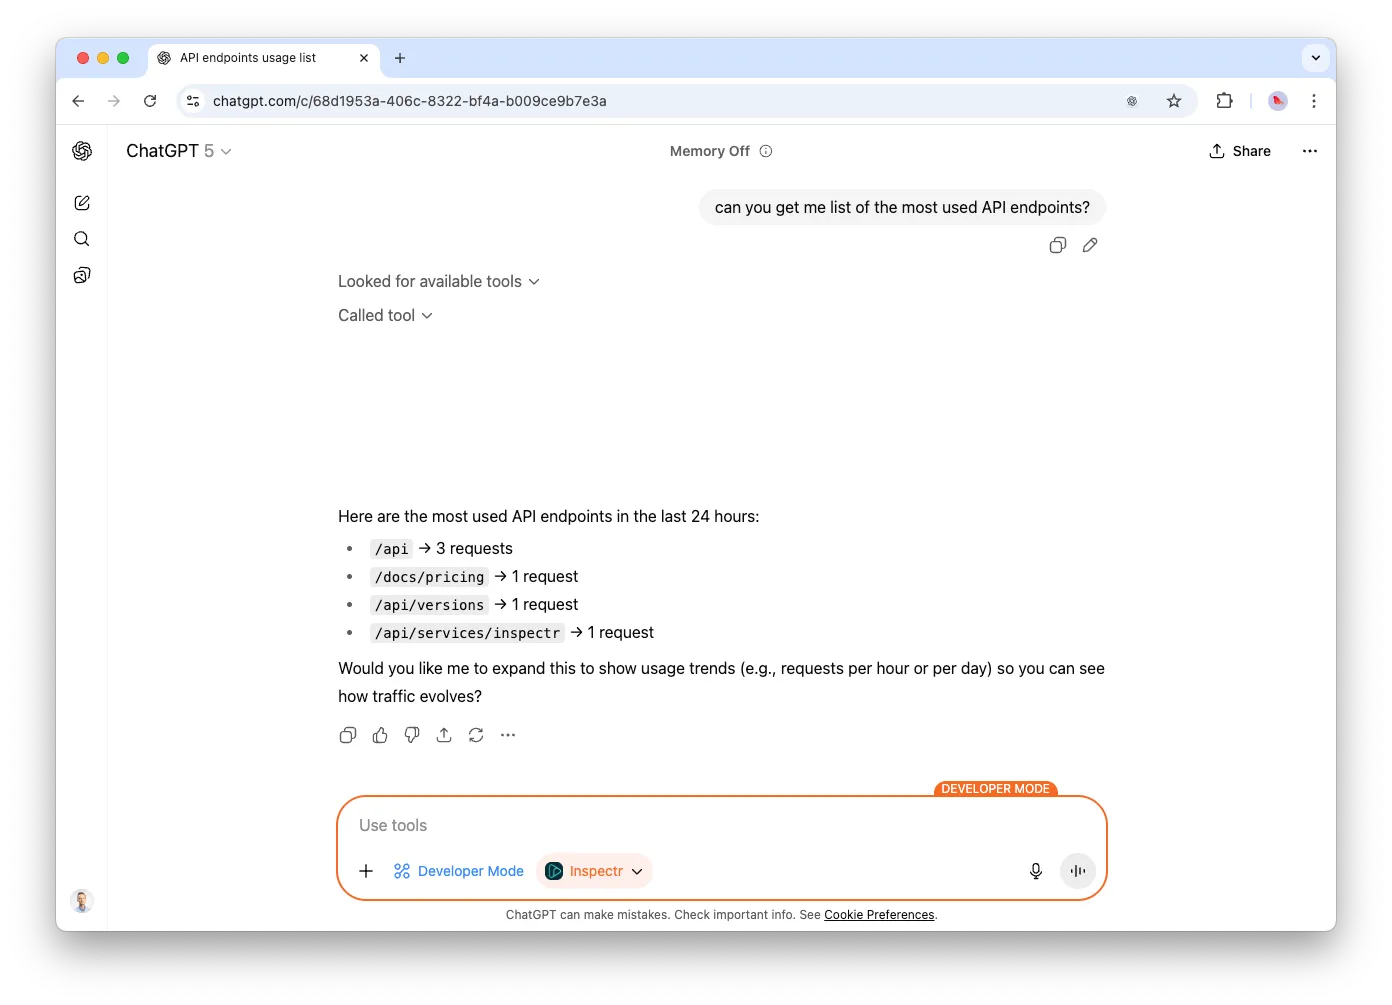
You can now run prompts that leverage the tools inside the MCP server and see the results directly in the chat.
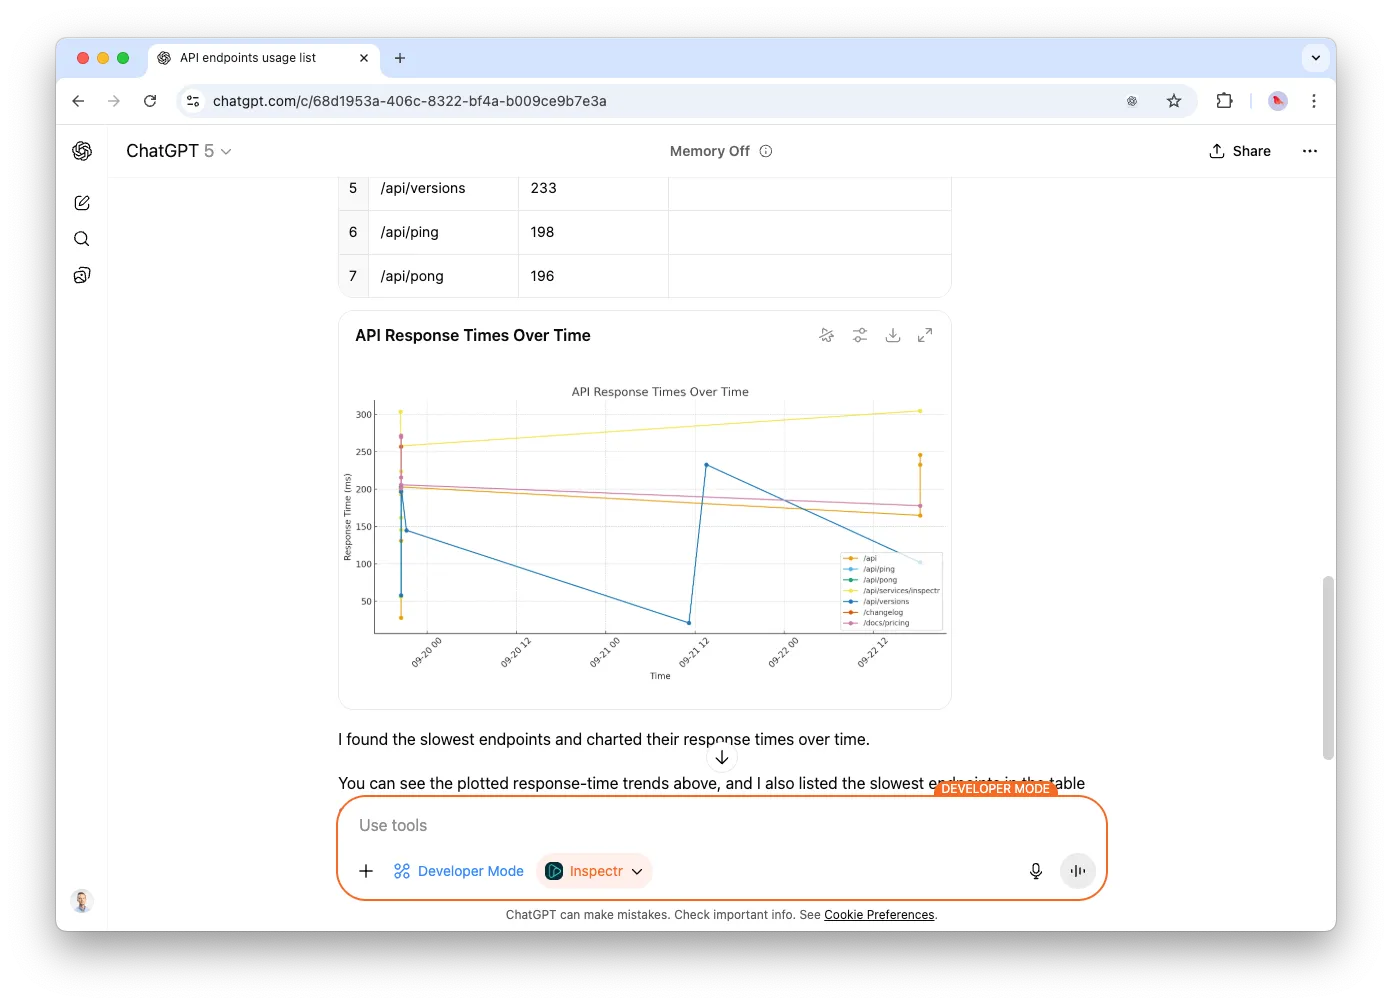
For example, let’s run a prompt that searches for the most used API endpoints:
Next we want see how the response times behaves:
View MCP Requests in Inspectr
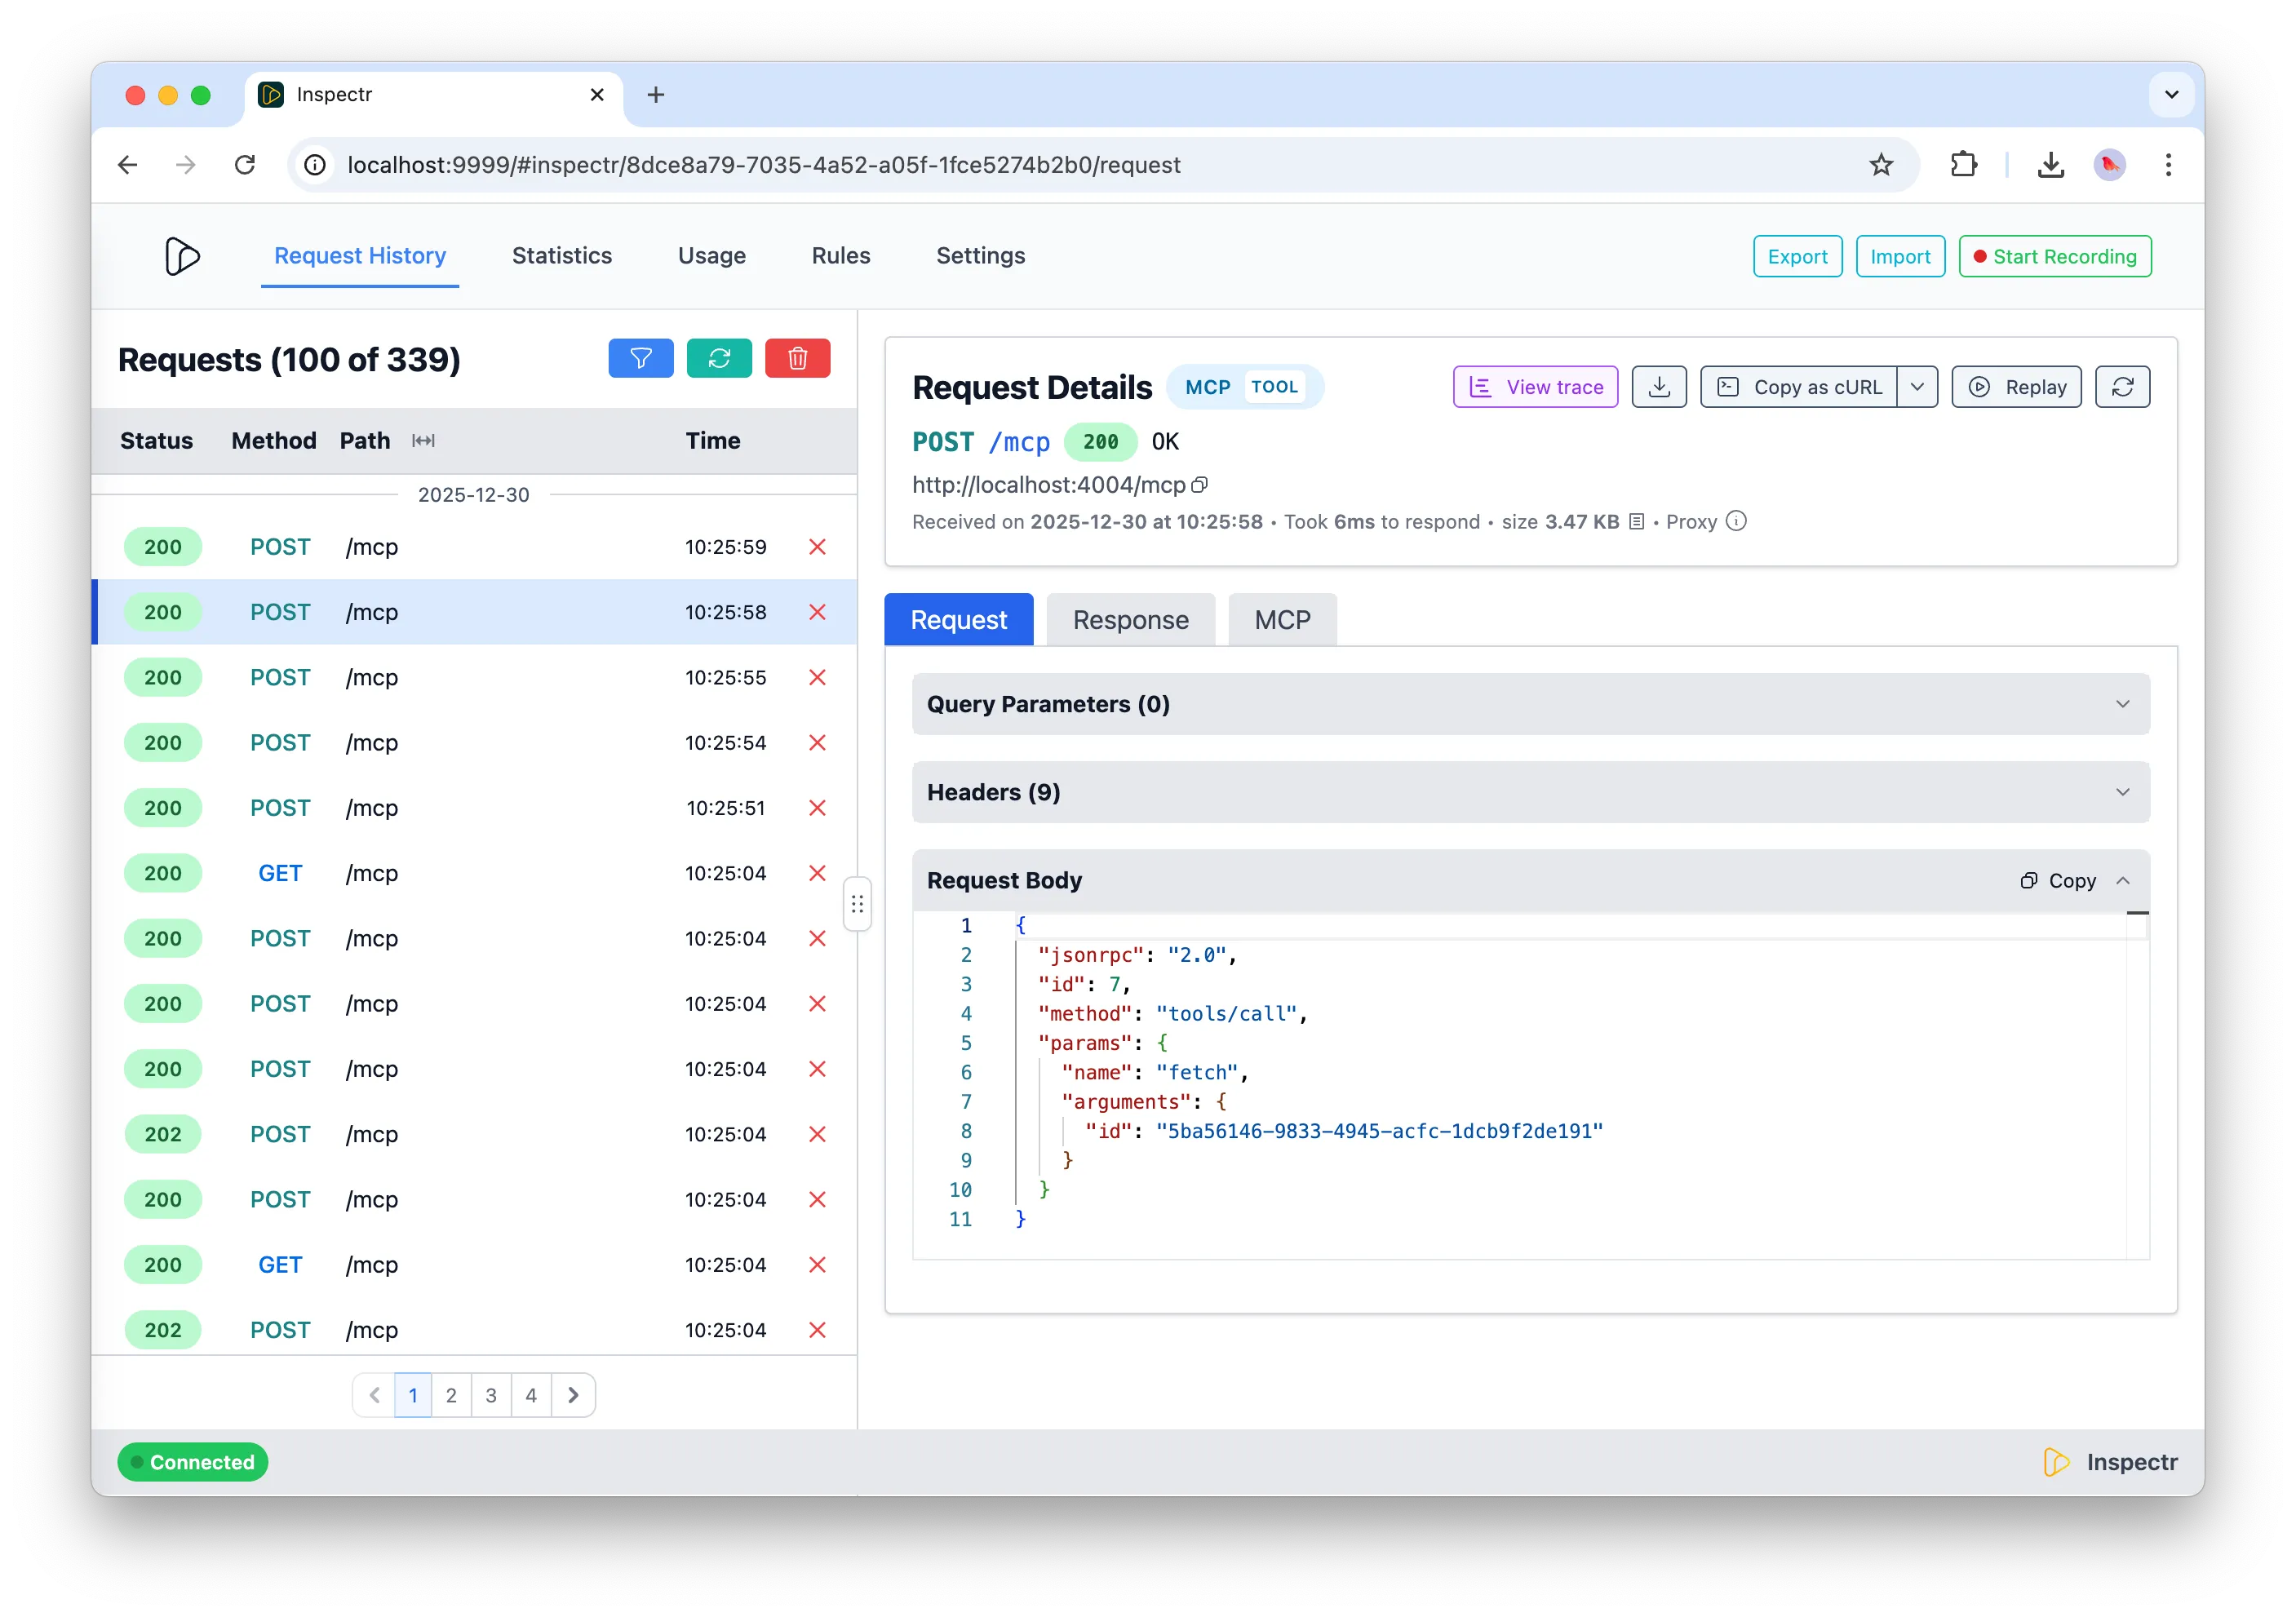
Section titled “View MCP Requests in Inspectr”To view how ChatGPT interacts with your MCP server; including tools, prompts, and resources — go to http://localhost:4004, where you’ll find a history of requests and responses.
Request made by ChatGPT
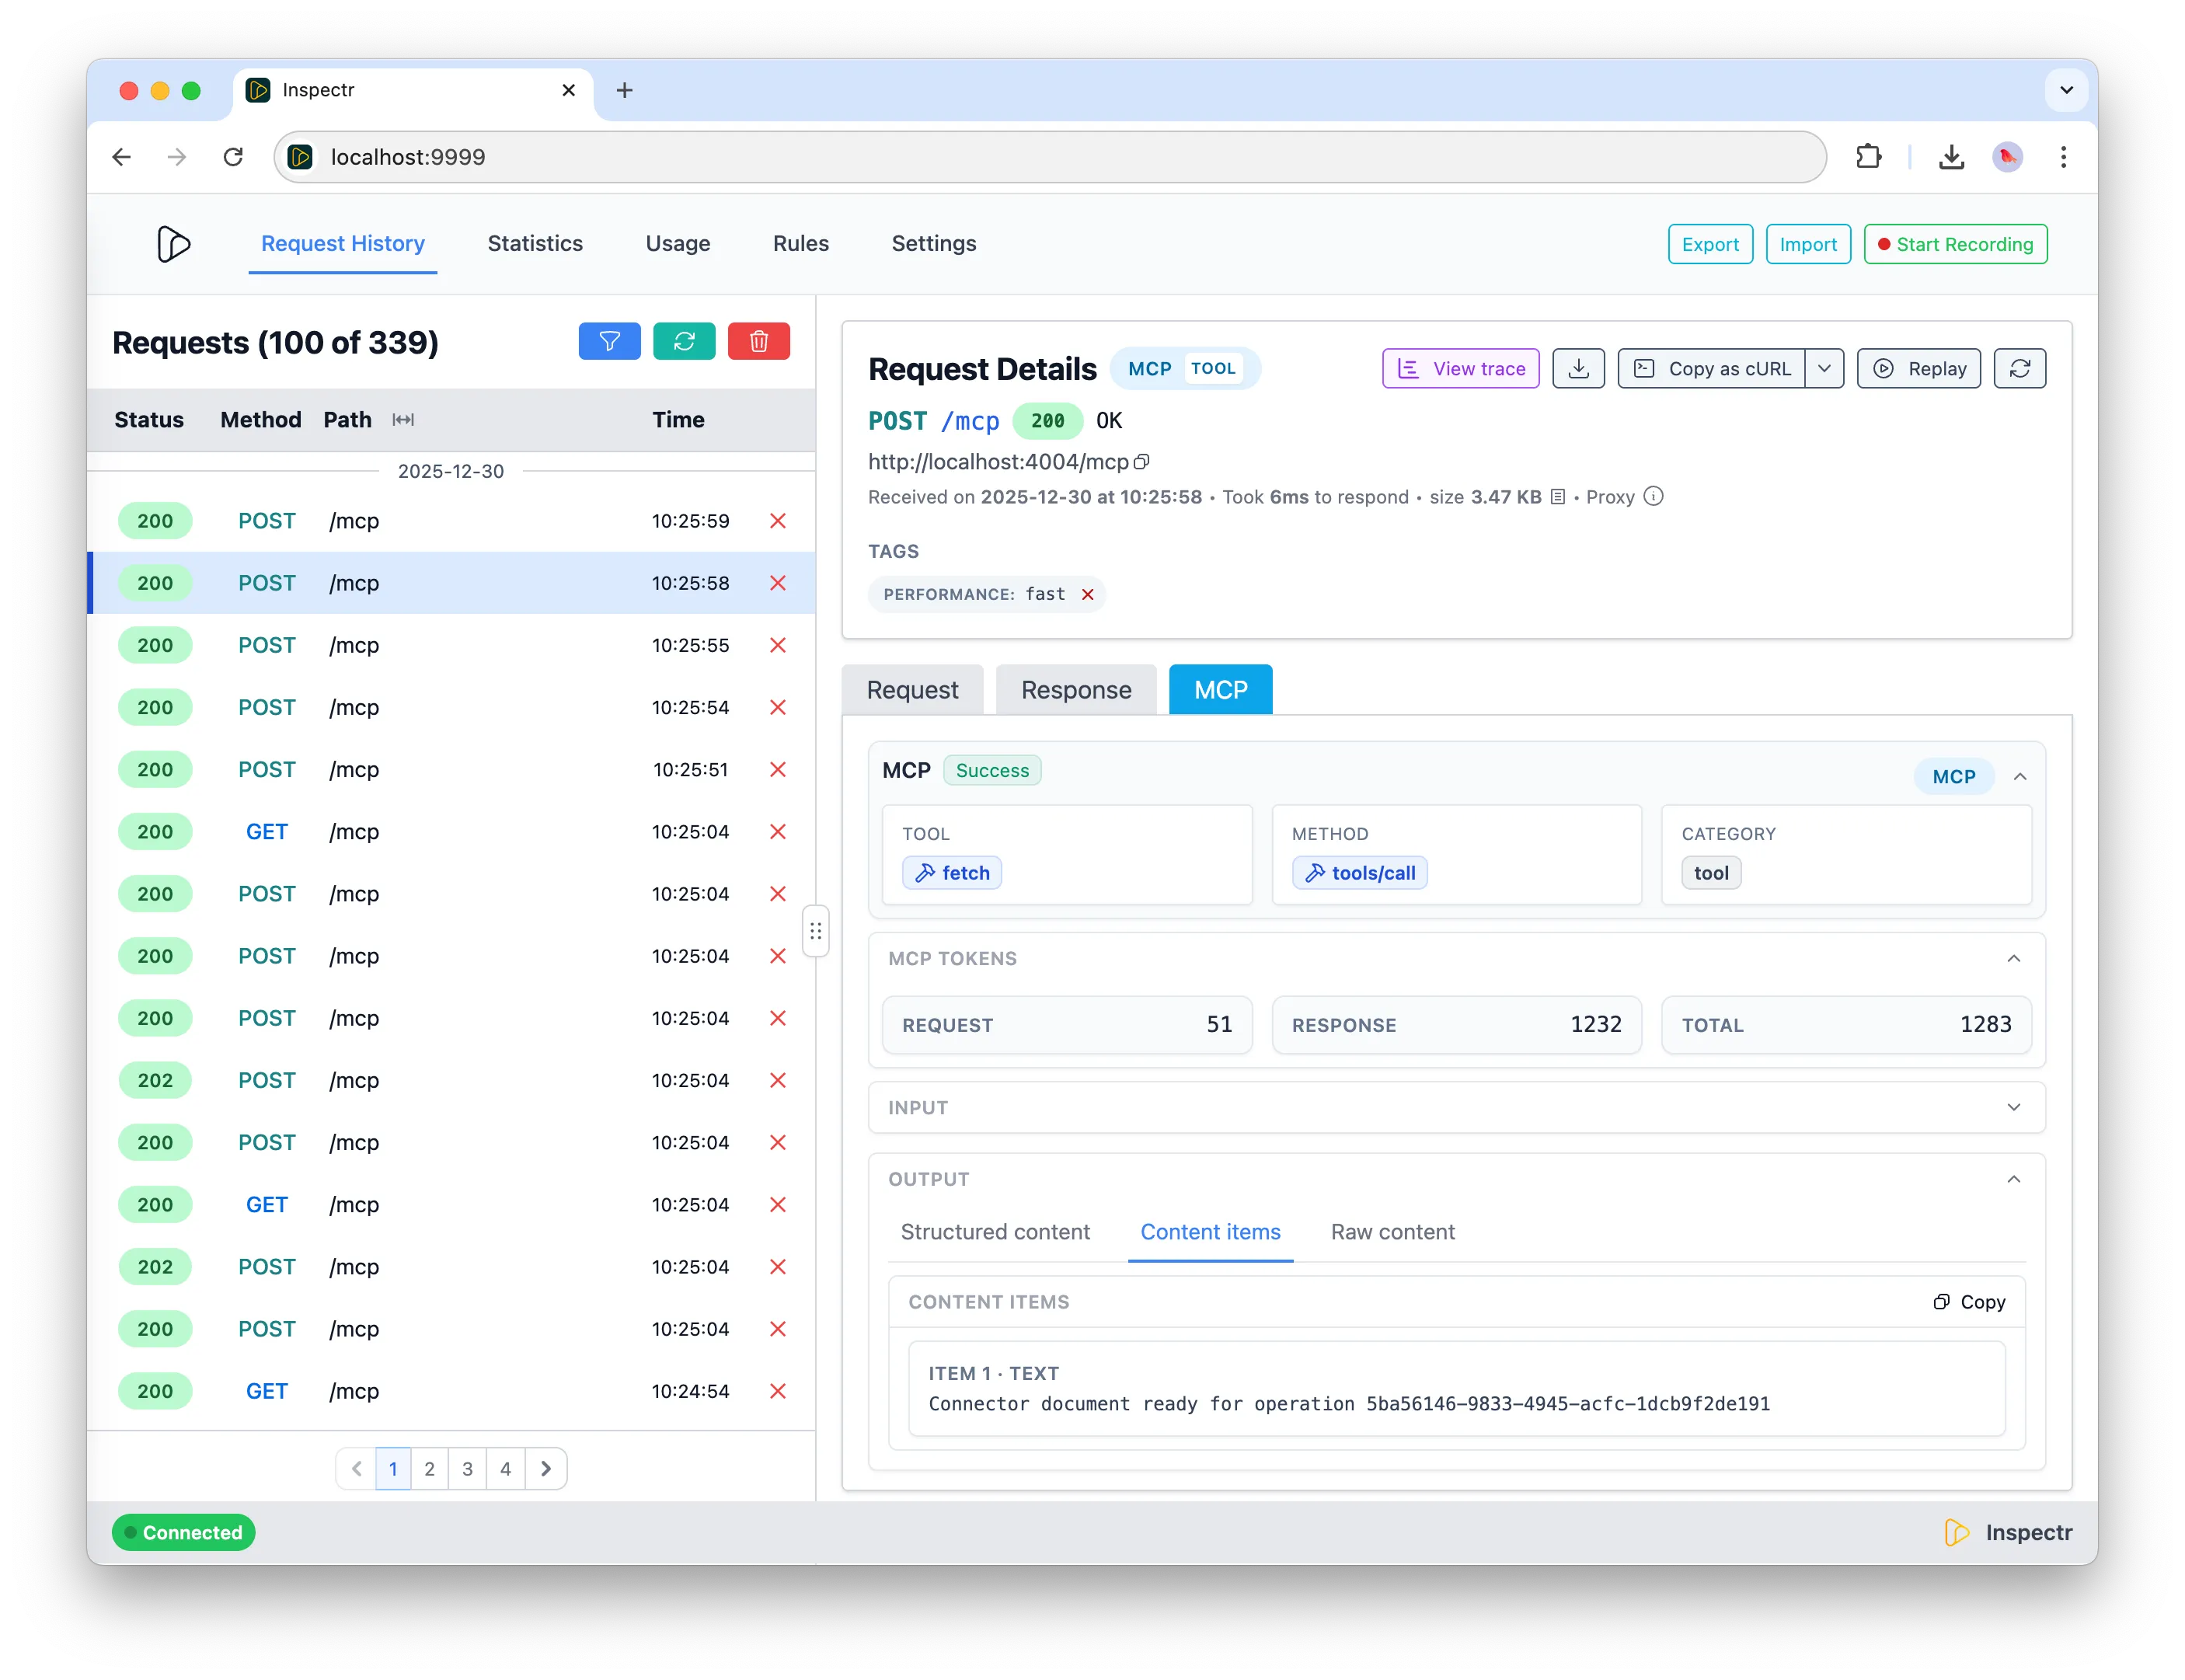
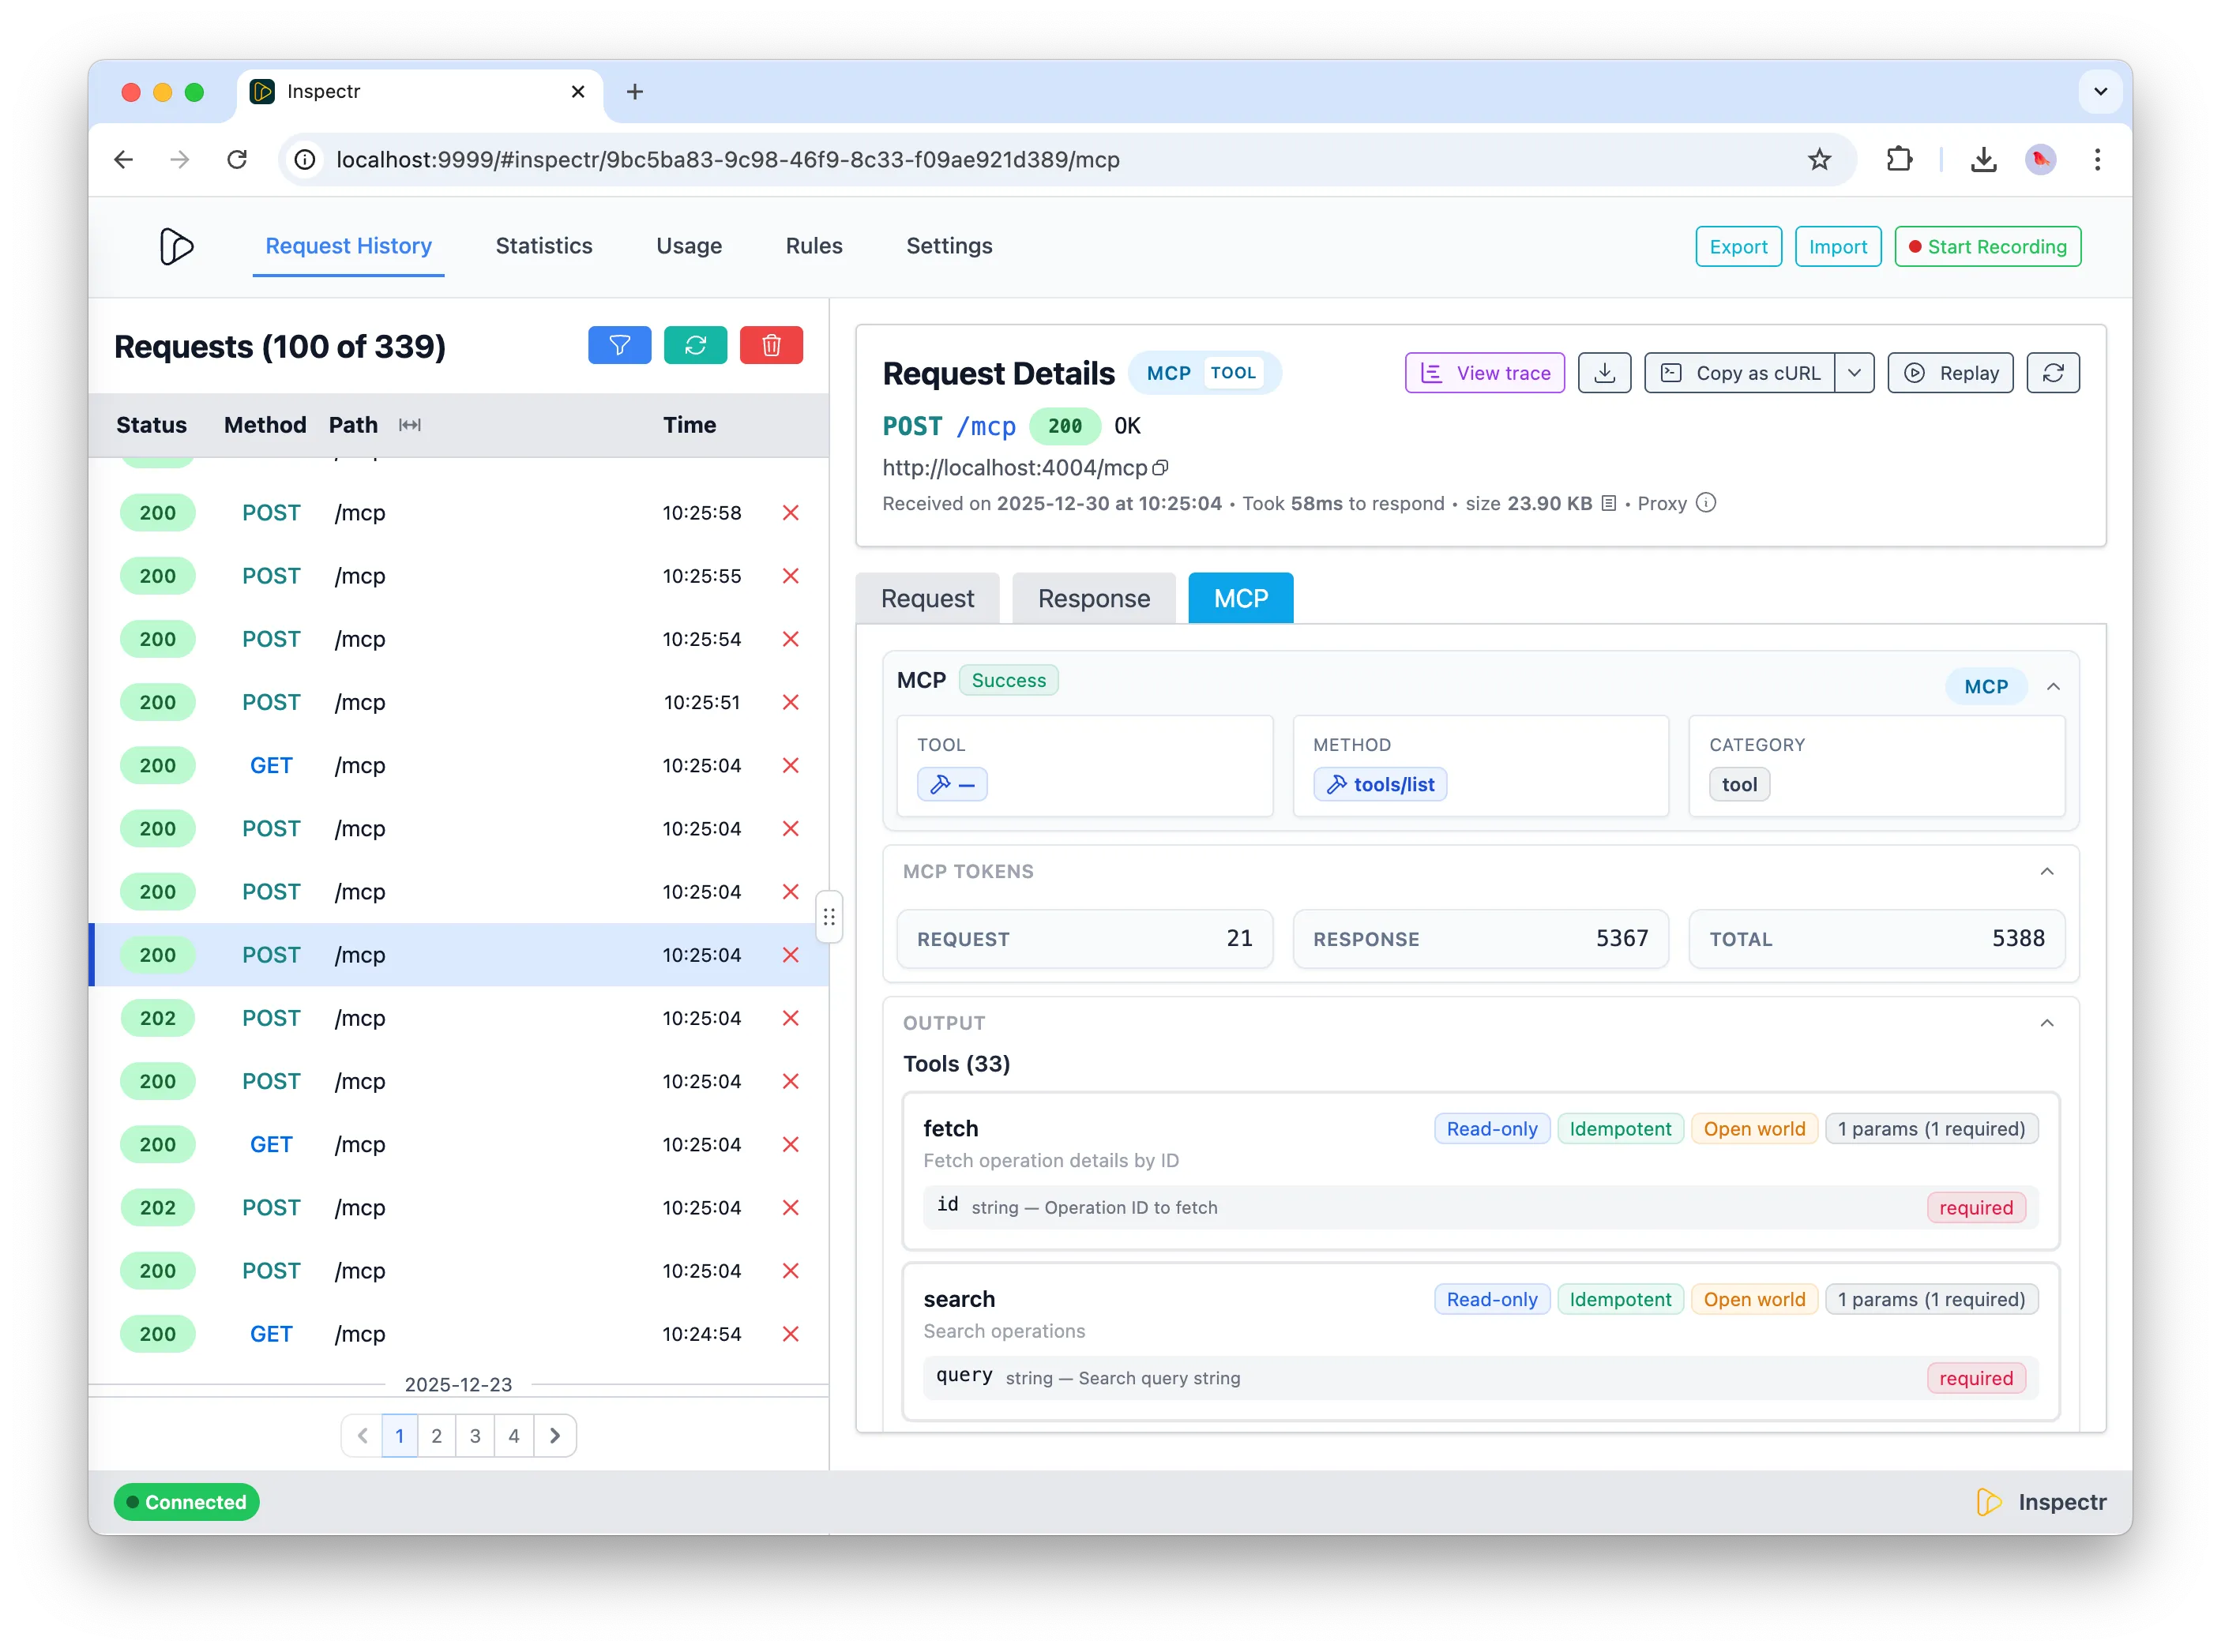
Responses from the MCP server
Summary
Section titled “Summary”Inspectr makes it easy to:
- Expose your local MCP server to OpenAI ChatGPT
- Monitor and review how ChatGPT uses your MCP tools, prompts, and resources
MCP Insights →